 Pin It
 There's something magical about the simple ritual of popping a frozen grape into your mouth on a sweltering afternoon when the kitchen feels unbearably hot. I discovered this trick years ago when my neighbor casually tossed one to me during a summer conversation, and I've been obsessed ever since. That single frozen orb was crisp, juicy, and tasted like pure concentration of sweetness without any of the guilt. Now whenever the thermometer climbs, the first thing I do is raid the fruit bowl and set up my freezer for what's become my favorite no-fuss snack.
I'll never forget bringing a batch to a family picnic where everyone was melting in the shade, complaining about the heat. Within minutes, people were asking me to make them again, and my sister started texting me asking for my "secret." There is no secret, really—just cold grapes and a little patience—but watching someone's face light up when they bite into that icy sweetness feels special every single time.
Ingredients
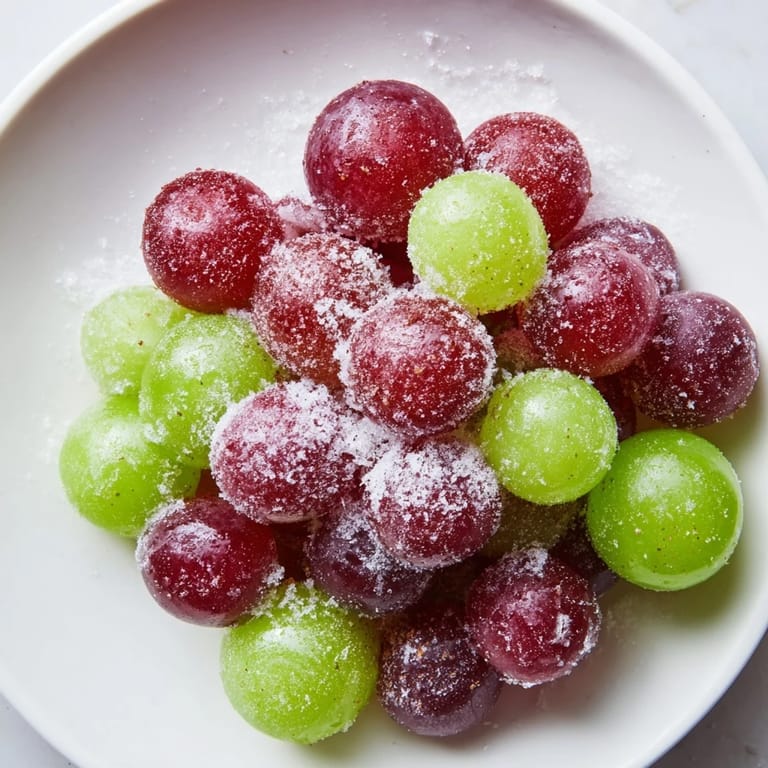
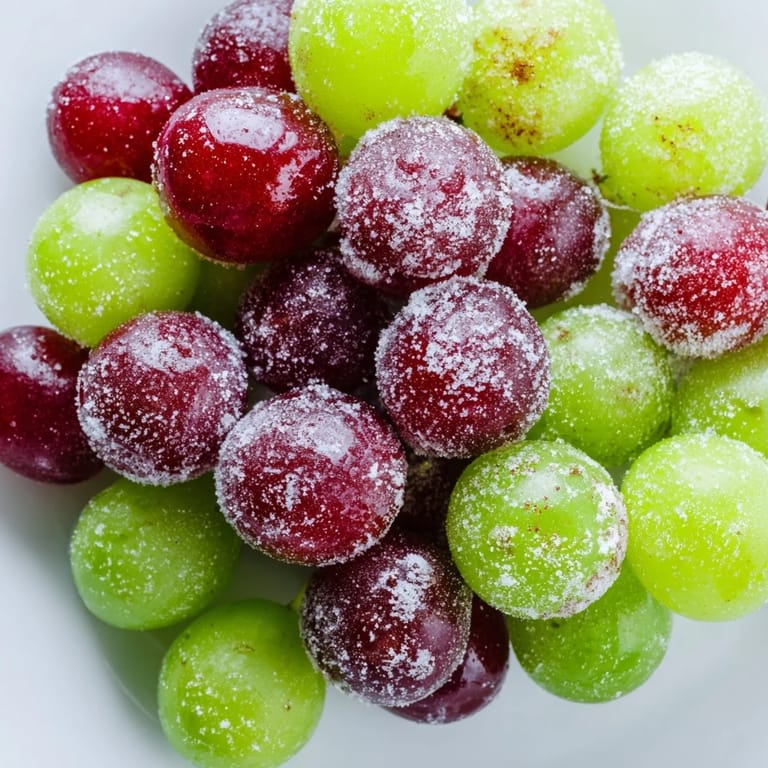
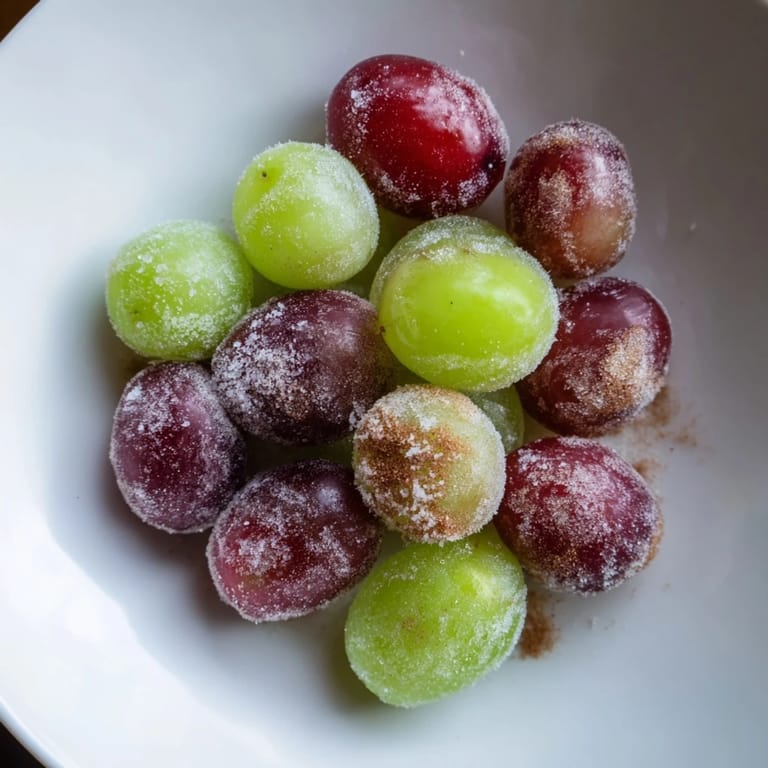
- Seedless grapes (red, green, or mixed): About 500 grams or 3 cups—the base of everything, and the variety you choose actually does change the flavor profile noticeably.
- Fresh lemon or lime juice: Two tablespoons if you want that subtle brightness underneath the sweetness, which keeps them from tasting one-dimensional.
- Granulated or coconut sugar: A light coating that adds texture and deepens the flavor without overpowering the natural fruit taste.
- Ground cinnamon: Just a teaspoon if you're feeling adventurous, though it's completely optional and brings a warm spice note that surprised me the first time.
Tired of Takeout? 🥡
Get 10 meals you can make faster than delivery arrives. Seriously.
One email. No spam. Unsubscribe anytime.
Instructions
- Wash and Prepare:
- Rinse your grapes thoroughly under cold running water, taking a moment to rub them gently between your fingers to remove any residue. Pat them completely dry with paper towels—moisture is the enemy of a crispy frozen texture—and pinch off all those little stems.
- Coat Them (Optional):
- If you're going for flavored grapes, toss them in a bowl with lemon or lime juice until they're lightly coated, then roll them in sugar and cinnamon until they look like tiny jewels. This step takes two minutes and transforms them into something that feels a bit more intentional.
- Arrange and Freeze:
- Spread your grapes in a single layer on a parchment-lined baking sheet—this prevents them from sticking together into one frozen lump. Slide them into the freezer and give them at least two hours, though I usually forget about mine and come back to them hours later.
- Store Properly:
- Once frozen solid, transfer them to an airtight container or freezer bag so they don't pick up strange flavors from the back of your freezer. They'll keep for weeks, though they never last that long in my house.
- Serve and Enjoy:
- Pull them straight from the freezer and eat them while they're still properly frozen, with that satisfying crunch when you bite down.
 Pin It
 There was an afternoon when my nephew came home from school complaining that he was bored and hungry, and I pulled out a container of these frozen grapes. He ate the entire thing while sitting at the counter telling me about his day, and it became our little ritual during his visits. That's when I realized this snack is about more than just beating the heat—it's about those quiet moments where something simple becomes a reason to pause together.
Flavor Variations That Actually Work
The beauty of frozen grapes is how they become a blank canvas for experimentation. I've tried them with a sprinkle of tajín for a spicy-citrus kick, rolled in shredded coconut for tropical vibes, and even dusted with a tiny bit of matcha powder when I was feeling fancy. Each variation tastes completely different, and the grapes themselves stay refreshingly neutral enough to play well with almost anything you want to throw at them.
When to Make These
I learned pretty quickly that frozen grapes are a summer essential, but they're equally welcome on hot spring days, during intense workout sessions when you want something hydrating, or whenever you're watching something and need a snack that won't stain your fingers or get your hands sticky. The five-minute prep time means there's no excuse to ever be caught unprepared on a sweltering day.
Storage and Beyond
These grapes honestly keep longer than you'd expect in an airtight container, and they're fantastic tossed into a smoothie bowl or tucked into a cheese board for a refreshing contrast. I've even started using them as edible ice cubes in water to add a hint of sweetness without watering down the drink as they melt.
- Pro move: thaw them slightly for a few minutes if they start to feel rock-hard, and they'll be easier to snack on without freezing your teeth.
- Grab them straight from the freezer when you want maximum crunch and cold intensity.
- Keep a batch on hand during any gathering, and you'll be remembered as the person who solved the heat problem.
 Pin It
 Frozen grapes taught me that sometimes the most craveable foods are the ones that require almost no effort, just a little planning and the willingness to pause when the heat demands it. Every bite tastes like relief and summer sunshine.
Recipe FAQs
- → How long should grapes be frozen?
Freeze grapes for at least 2 hours until completely solid for the best icy texture.
- → Can I add flavors before freezing?
Yes, tossing grapes with lemon or lime juice and sugar or cinnamon adds a refreshing twist.
- → What grape types work best?
Seedless red, green, or mixed grapes all freeze well and offer pleasant variations.
- → How should frozen grapes be stored?
Keep frozen grapes in an airtight container or freezer bag to maintain freshness and prevent freezer burn.
- → Are frozen grapes suitable for special diets?
Yes, they are vegan, gluten-free, and free from common allergens, making them widely suitable.