 Pin It
 The first time I watched someone pull that frozen pint from their Ninja Creami and watch it transform into something creamy and cloud-like, I was hooked. I'd been searching for a post-workout treat that didn't feel like punishment, and this protein ice cream became my answer. What started as curiosity turned into a ritual—blending, freezing, and then that satisfying spin cycle that somehow made protein powder taste like dessert instead of obligation. There's something almost magical about how simple ingredients become something you actually want to eat.
I made this for my roommate after he complained about meal prep being boring, and watching his face when he took that first spoonful made it worth every minute. He started making his own batches within a week, customizing flavors like some kind of kitchen scientist. That's when I realized this wasn't just a recipe—it was the kind of thing people actually get excited about eating.
Ingredients
- Greek yogurt or skyr (1 cup): This is your foundation—thick, creamy, and packed with protein so you don't need to rely solely on powder for that smooth texture.
- Unsweetened almond milk (1 cup): Keeps the mixture blendable and creates the right consistency when frozen; use regular milk if you want richer results.
- Protein powder (2 scoops, vanilla or chocolate): The backbone of this whole endeavor—choose a quality powder because you'll actually taste it here, unlike in a smoothie you're chugging.
- Maple syrup or sweetener (1–2 tablespoons): Taste as you blend; you want sweet without that artificial aftertaste hanging around.
- Vanilla extract (1 teaspoon): A small amount does surprising work in masking any powdery notes.
- Salt (pinch): Trust me on this—it brightens everything and makes the sweetness taste more balanced.
Tired of Takeout? 🥡
Get 10 meals you can make faster than delivery arrives. Seriously.
One email. No spam. Unsubscribe anytime.
Instructions
- Blend Your Base:
- Combine the yogurt, milk, protein powder, sweetener, vanilla, and salt in your blender and mix until completely smooth with no powder specks visible. This only takes a minute or two, but take it seriously—lumpy base means lumpy ice cream.
- Pour and Level:
- Transfer the mixture to your freezer-safe container, making sure the surface is level so it freezes evenly. A Ninja Creami pint works perfectly, but any shallow freezer container will do.
- Freeze Overnight:
- Let it sit in the freezer for at least eight hours, though overnight is ideal. You'll know it's ready when it's completely solid all the way through.
- Spin Into Magic:
- Remove the container and follow your machine's instructions—usually the Ice Cream setting if you're using a Creami. Watch it transform from a frozen block into something creamy and scoopable.
- Adjust the Texture:
- If it comes out too firm, re-spin it or add a splash of cold milk and spin again for something softer. Sometimes you want it denser, sometimes you want it almost soft-serve; experiment here.
- Top and Serve:
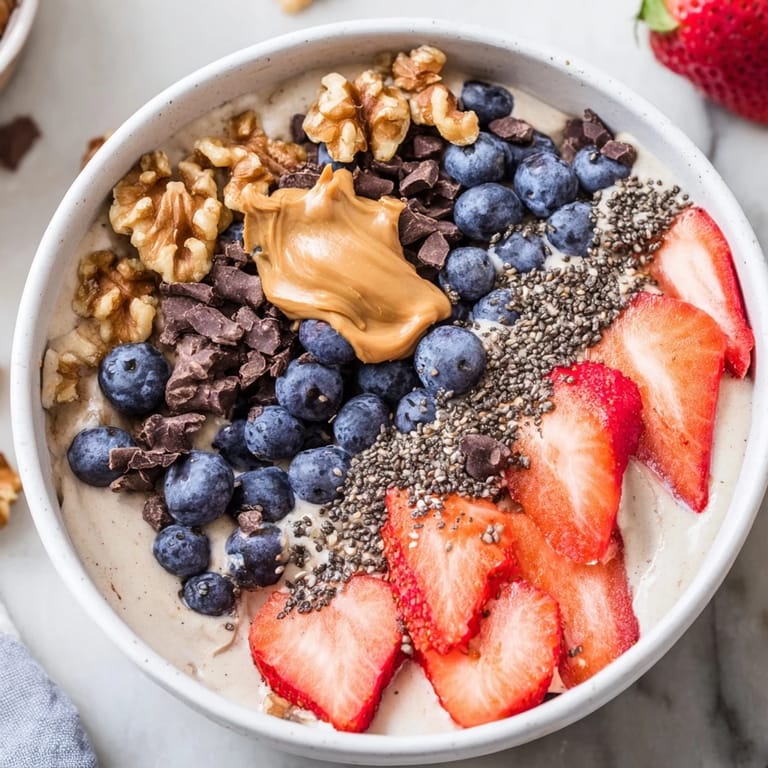
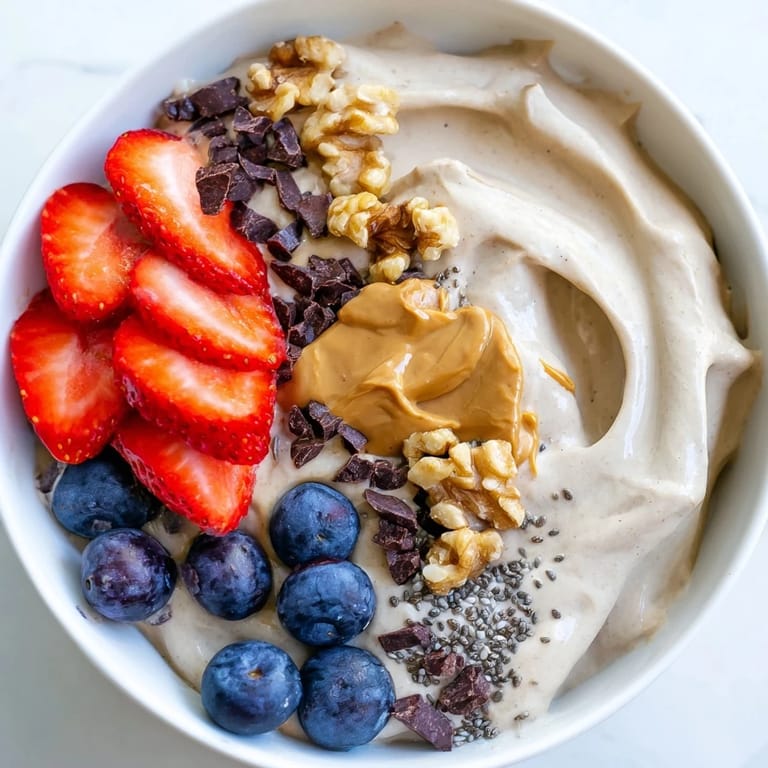
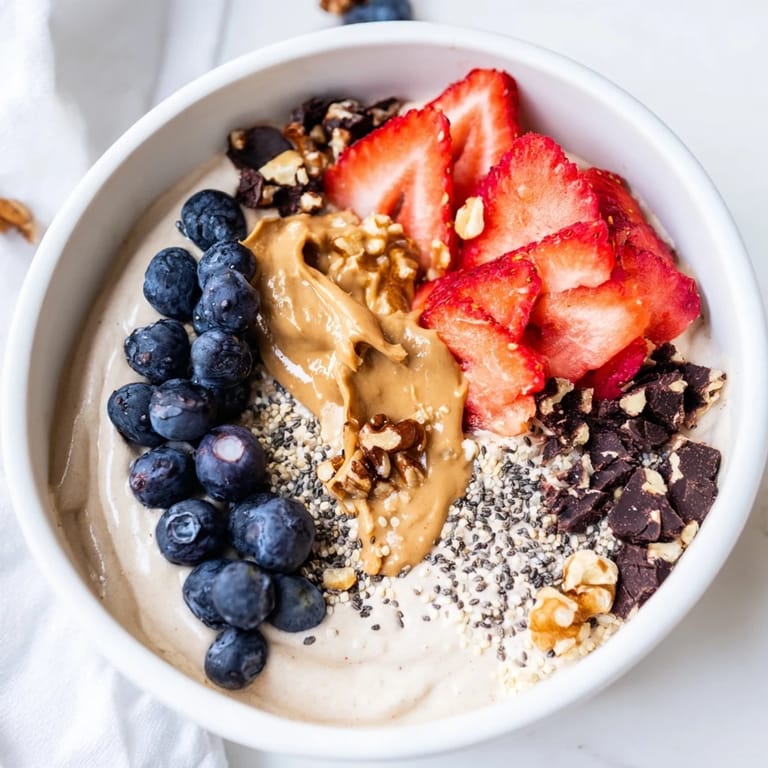
- Scoop into bowls while it's cold and top with whatever calls to you—berries, nut butter, chocolate chips, seeds. Eat immediately while it still has that perfect texture.
 Pin It
 One morning I made a batch with cocoa powder mixed into the base, and my whole apartment smelled like a chocolate shop. That's when I stopped thinking of this as just a protein hack and started seeing it as actual dessert I could feel good about. The shift in mindset changed everything about how I enjoyed it.
Flavor Variations That Actually Work
Vanilla is your safe choice, but this base is forgiving enough for experimentation. Add a teaspoon of instant coffee to chocolate protein powder for something that tastes like a mocha shake, or blend in a quarter cup of pureed berries before freezing for a naturally sweet fruit version. I've tried adding cocoa powder, almond extract, and even a tiny bit of maple extract—they all work because the yogurt and milk keep everything creamy regardless.
Making It Vegan
If dairy isn't your thing, swap the Greek yogurt for a thick plant-based yogurt like cashew or oat-based, and use vegan protein powder in whatever flavor matches your preference. The texture and creaminess stay exactly the same because you're working with the same blending principle. I've made this for vegan friends and nobody noticed the difference, mostly because they were too busy enjoying actual dessert instead of something that tastes like regret.
Storage and Make-Ahead Strategy
This freezes beautifully for up to two weeks, which means you can batch-prep multiple pints and have instant protein dessert whenever you need it. I keep one in the freezer at all times because it's saved me from midnight chocolate cravings more times than I can count. Just pull it out, spin it, and you have a treat that took zero effort in the moment.
- Prep pints on Sunday and you have dessert ready all week without any daily effort.
- The texture actually improves slightly after sitting frozen for a couple days as flavors meld together.
- If it freezes too solid after a few days, let it thaw for five minutes at room temperature before spinning.
 Pin It
 This is the kind of recipe that bridges the gap between healthy eating and actually wanting dessert—no sacrifice required, just real food that tastes good. Once you make it once, you'll understand why it's become my favorite kitchen shortcut.
Recipe FAQs
- → What makes this ice cream bowl high in protein?
The base combines Greek yogurt or skyr with protein powder, delivering a rich source of protein per serving.
- → Can I customize the toppings?
Yes, you can add fresh berries, nut butters, chocolate chips, nuts, or seeds to suit your taste and nutritional needs.
- → Is there a plant-based alternative?
Use plant-based yogurt and vegan protein powder to create a dairy-free, vegan-friendly version.
- → How long should the mixture freeze before serving?
Freeze the blended mixture for at least 8 hours or overnight to achieve the ideal texture.
- → What equipment is needed to prepare this bowl?
A blender for mixing and a freezer-safe container to freeze the base, plus optionally an ice cream maker for texture refinement.