 Pin It
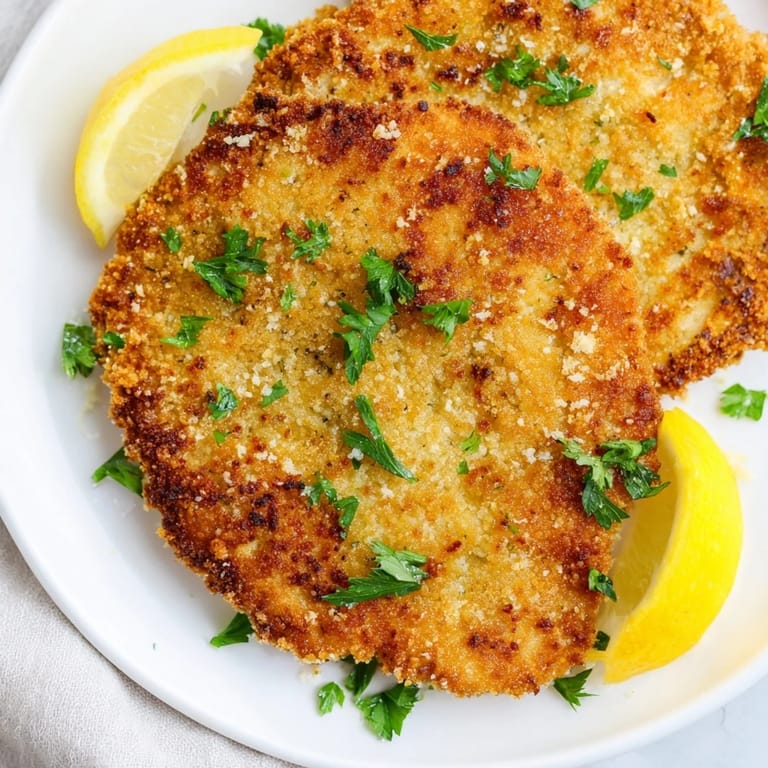
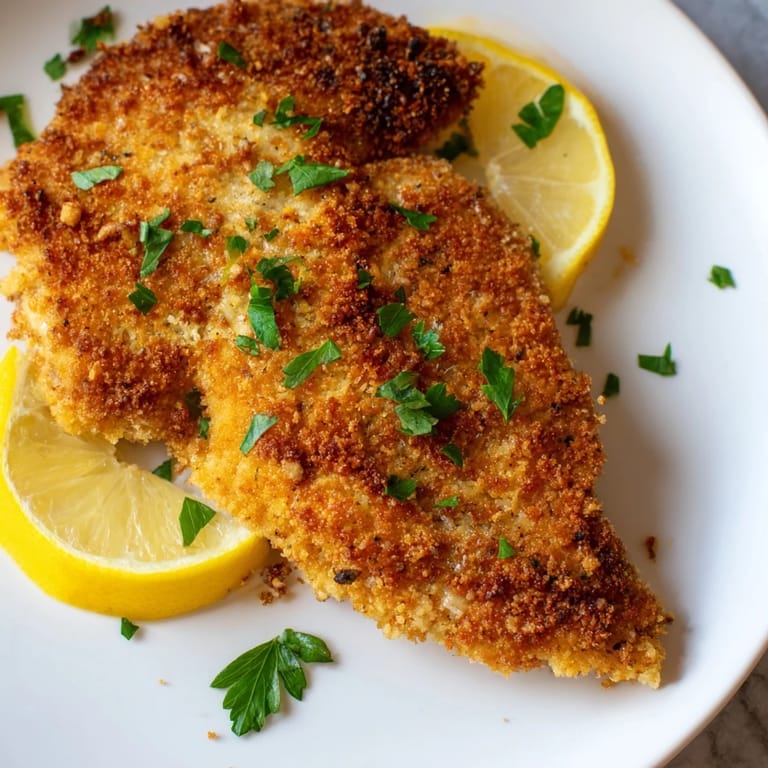
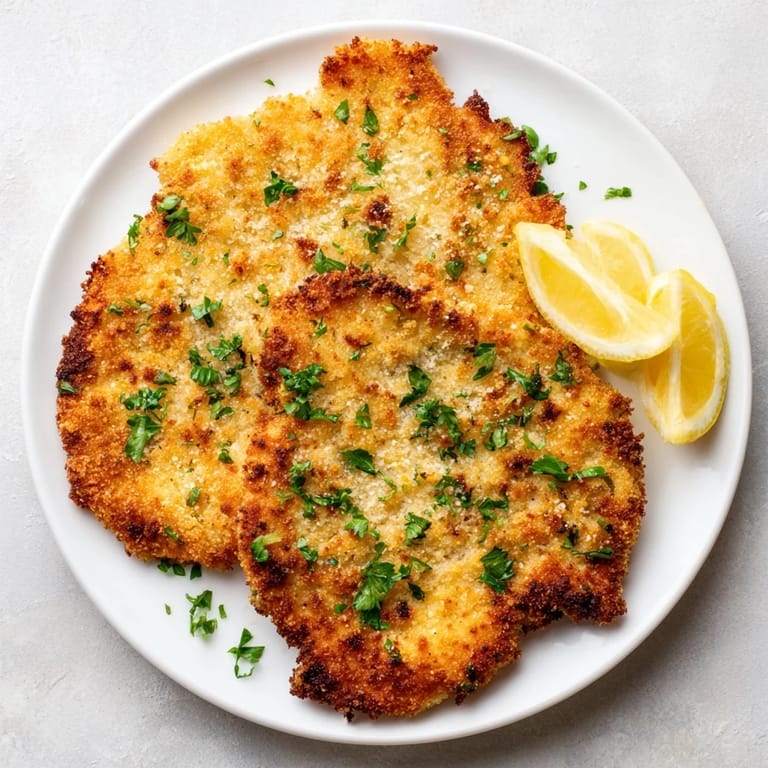
 My neighbor once knocked on my door holding a lemon and asking if I had anything that would go with it. I had chicken breasts thawing and a hunch. Twenty minutes later, we were both standing over the stove, watching these cutlets turn the kind of gold that makes you forget you were supposed to be doing laundry. The Parmesan in the crust smelled nutty and sharp, and the panko gave it a crackle I didn't know I needed in my life. We ate them right off the cutting board with our fingers, laughing because neither of us wanted to wait for plates.
I made this on a Wednesday night when my sister came over unannounced, tired from work and hungry in that impatient way. She sat at the counter and watched me coat each piece, asking questions about the egg wash like she was taking notes. When I flipped the first cutlet and that sizzle hit the air, she stopped talking. We ate in near silence, which for us is the highest compliment.
Ingredients
- Boneless, skinless chicken breasts (4, about 150 g each): Pounding them thin is the key to quick, even cooking and a tender bite that doesn't feel like chewing through a novel.
- Large eggs (2): The glue that holds the crust to the chicken, beaten with a splash of milk to keep everything smooth and clingy.
- Milk (2 tablespoons): Loosens the egg just enough so the coating doesn't clump or tear when you dip.
- Grated Parmesan cheese (1 cup / 100 g): This is not the time for pre-shredded cheese in a bag, freshly grated Parmesan melts into the crust and crisps up like lace.
- Panko breadcrumbs (1 cup / 100 g): Light, jagged, and crispy in a way regular breadcrumbs will never be, they create texture you can hear.
- All-purpose flour (1/2 cup / 60 g): The first layer that dries the chicken and gives the egg something to grip onto.
- Garlic powder (1 teaspoon): A quiet hum of flavor that doesn't scream but makes everything taste more like itself.
- Dried oregano (1 teaspoon): A whisper of Italian warmth that makes the crust feel like it has a backstory.
- Salt (1/2 teaspoon): Seasons the meat before it even meets the oil.
- Black pepper (1/2 teaspoon): Just enough to remind you this isn't bland weeknight chicken.
- Olive oil (1/3 cup / 80 ml): The medium that turns raw into golden, use enough so the cutlets fry instead of steam.
- Lemon wedges: A squeeze of brightness that cuts through the richness and makes you want another bite.
- Fresh parsley, chopped (optional): A handful of green that makes the plate look like you tried, even if you didn't.
Tired of Takeout? 🥡
Get 10 meals you can make faster than delivery arrives. Seriously.
One email. No spam. Unsubscribe anytime.
Instructions
- Pound the chicken:
- Place each breast between two sheets of plastic wrap and use a meat mallet or rolling pin to pound it to about 1/2 inch thickness. This is oddly satisfying and ensures the chicken cooks in minutes instead of drying out.
- Season the meat:
- Sprinkle both sides with salt and pepper before breading. This is your only chance to season the chicken itself, so don't skip it.
- Set up your breading station:
- Line up three shallow bowls, flour in the first, eggs whisked with milk in the second, and the Parmesan-panko mixture in the third. This assembly line keeps your hands from turning into breaded mittens.
- Coat each cutlet:
- Dredge the chicken in flour, tap off the excess, dip it in the egg, and press it firmly into the breadcrumb mixture on both sides. The pressing matters, it's what makes the crust stick and crisp instead of flaking off in the pan.
- Heat the oil:
- Pour the olive oil into a large skillet and set it over medium-high heat until it shimmers but doesn't smoke. Drop in a breadcrumb to test, if it sizzles immediately, you're ready.
- Fry the cutlets:
- Cook in batches, 3 to 4 minutes per side, until the crust is deep golden and the internal temperature hits 74°C or 165°F. Don't crowd the pan or the temperature drops and everything steams instead of crisps.
- Drain and serve:
- Transfer the cutlets to a paper towel-lined plate to blot the oil, then serve hot with lemon wedges and parsley. The lemon isn't optional in spirit, it's the thing that makes you want to eat the whole plate.
 Pin It
 The first time I served this to my father, he ate three pieces and then asked if I'd been taking secret cooking classes. I hadn't, but I didn't tell him that. Sometimes a recipe works so well it makes you look like you know what you're doing, and this is one of them.
What to Serve It With
I like to keep the sides simple so the cutlets stay the star. A handful of arugula tossed with olive oil and lemon makes the plate feel light and fresh. Roasted vegetables, especially zucchini or cherry tomatoes, add color without competing. If you want something heartier, a tangle of buttery pasta or a pile of mashed potatoes turns this into the kind of dinner that sticks to your ribs in the best way.
Storing and Reheating
Leftovers keep in the fridge for up to three days, and they're still good cold in a sandwich the next day. If you want to reheat them and keep the crust crispy, skip the microwave and use the oven at 180°C (350°F) for about 10 minutes. The crust won't be quite as shattery as fresh, but it's close enough that you won't feel cheated.
Little Adjustments That Make a Difference
If you like heat, a pinch of chili flakes in the breadcrumb mixture adds a gentle kick without overwhelming the Parmesan. You can also swap the oregano for thyme or basil if that's what you have. I've made this with vegetable oil instead of olive oil when I was out, and it worked fine, though the flavor is a little less fruity.
- Try adding a tablespoon of Dijon mustard to the egg wash for a subtle tang that clings to the crust.
- If you're feeding kids, cut the cutlets into strips before breading for homemade chicken tenders they'll actually eat.
- Leftover cutlets are incredible sliced thin and piled onto a sandwich with mayo, tomato, and lettuce.
 Pin It
 This is the kind of recipe that makes weeknight cooking feel less like a chore and more like something you'd choose to do even if no one was hungry. Once you get the rhythm down, it's faster than you think and better than anything you'd find in a restaurant.
Recipe FAQs
- → How do I keep the coating crispy after cooking?
Transfer cooked cutlets to a paper towel-lined plate immediately after cooking to absorb excess oil. For storage, reheat in a 350°F oven for 10 minutes rather than microwaving, which can soften the crust.
- → Can I prepare the breaded cutlets ahead of time?
Yes, you can bread the chicken up to 8 hours in advance and refrigerate on a parchment-lined tray. This also helps the coating adhere better. Cook directly from the refrigerator, adding an extra minute per side if needed.
- → What's the difference between panko and regular breadcrumbs?
Panko breadcrumbs are larger and airier, creating a much crispier, lighter crust with better texture. Regular breadcrumbs pack more densely and absorb more oil, resulting in a heavier coating. Panko is recommended for this dish.
- → How thin should I pound the chicken?
Pound each breast to approximately 1/2 inch thickness. This ensures even cooking throughout and creates a delicate texture while maintaining juiciness. Thicker cutlets may dry out before the coating fully crisps.
- → Can I use chicken thighs instead of breasts?
Thighs work well but require longer cooking—6-7 minutes per side. They're more forgiving and stay moist, though slightly fattier. Pound them the same thickness for even cooking and consistent results.
- → What oil is best for pan-frying?
Olive oil adds authentic Italian flavor and has a decent smoke point for this application. Vegetable oil, canola oil, or avocado oil work too. Avoid butter alone as it burns at the high heat needed for crispiness.