 Pin It
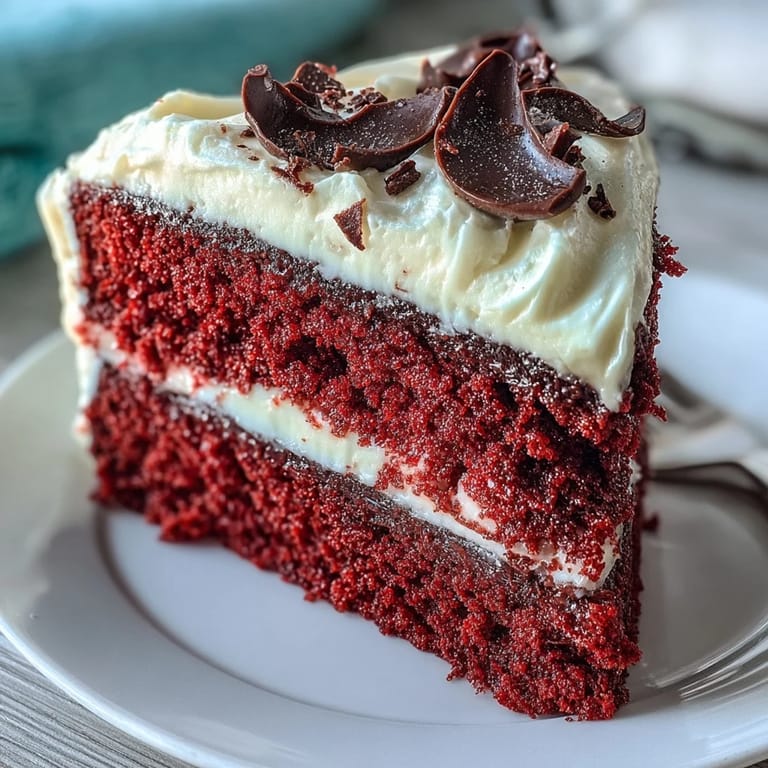
 The kitchen smelled like butter and nostalgia when I first attempted this cake for my best friend's birthday. She had this vintage Betty Boop poster in her college apartment, and I thought channeling that playful energy into dessert would be perfect. Three tries later, I finally got the red velvety crumb right and figured out how to make the chocolate silhouette actually stay intact. Now it's the cake everyone requests for their milestone moments, and I smile every time I break out the heart pans.
Last Valentine's Day, I made six of these cakes in one weekend for a bakery fundraiser, and my kitchen looked like a red crime scene by sunset. But watching customers' faces light up when they recognized that iconic silhouette made every stained apron worth it. My partner walked in, took one look at the chocolate hearts cooling on racks, and asked if we were starting a dessert tattoo parlor.
Ingredients
- Cake flour: The lower protein content keeps this red velvet tender, and I learned the hard way that allpurpose makes it tough
- Natural cocoa powder: Just enough to deepen the red without turning the cake brown, exactly how my grandmother insisted red velvet should taste
- Room temperature butter and eggs: I once tried rushing this step and ended up with a curdled mess that taught me patience is actually an ingredient
- Red gel coloring: Liquid thins the batter, but gel gives you that impossible carnival ride red without changing the chemistry
- Buttermilk: The tang that cuts through all that sugar and activates the baking soda for the loftiest rise
- White vinegar: This reacts with baking soda and buttermilk to create those signature velvet tender crumb pockets
- Cream cheese: Full fat only, anything less gives you a sad runny frosting that slides right off the cake
- Dark chocolate: The bitter contrast against sweet red cake is why this combination works so perfectly together
Tired of Takeout? 🥡
Get 10 meals you can make faster than delivery arrives. Seriously.
One email. No spam. Unsubscribe anytime.
Instructions
- Get your oven and pans ready:
- Preheat to 350°F and grease two heartshaped pans, because nothing says love like buttered bakeware
- Whisk the dry ingredients:
- Combine flour, cocoa, baking powder, baking soda, and salt in a medium bowl, then set aside for later
- Cream butter and sugar:
- Beat butter for 1 minute until creamy, then gradually add sugar and cream for 2 to 3 minutes until the mixture looks pale and fluffy
- Add eggs one at a time:
- Beat each egg completely into the batter before adding the next, scraping down the bowl so nothing gets left behind
- Make it red:
- Stir in the red gel, vanilla, and vinegar until the batter transforms into that impossible shade of crimson
- Alternate wet and dry ingredients:
- Mix in one third of the dry ingredients, then half the buttermilk, repeating until everything is just combined and still a bit lumpy
- The secret fizz step:
- Mix that last teaspoon of vinegar with baking soda, watch it foam, then gently fold it into the batter for extra lift
- Bake until perfect:
- Divide batter between pans and bake for 25 to 30 minutes, until a toothpick comes out clean and the kitchen smells like celebration
- Cool completely:
- Let cakes rest in pans for 10 minutes, then turn them out onto wire racks to cool entirely before frosting
- Make the frosting:
- Beat cream cheese and butter for 2 minutes until smooth, then gradually add powdered sugar, salt, and vanilla until fluffy
- Assemble the layers:
- Spread frosting between the cake layers, apply a thin crumb coat, and chill for 10 minutes before the final smooth layer
- Create the silhouette:
- Pipe melted dark chocolate over your Betty Boop stencil onto parchment, let it set completely, then carefully transfer onto the cake
 Pin It
 My sister asked for this cake at her engagement party, and I spent three hours perfecting that chocolate silhouette the night before. When she saw it, she actually teared up and said it was exactly the playful touch her wedding needed. Now I can't make this cake without thinking about how dessert becomes memory when you share it with people you love.
Making The Perfect Red Velvet
I discovered that red velvet is essentially a chemistry experiment between acid and base, and that's what makes it different from regular chocolate cake. The vinegar reacts with baking soda and buttermilk, creating those tiny air pockets that make each bite feel like eating a flavored cloud.
Working With Chocolate Decorations
After years of breaking delicate chocolate shapes, I finally learned that temperature control is everything. Let the chocolate set at room temperature instead of rushing it in the fridge, and it will peel away from parchment like a dream instead of shattering into chocolate confetti.
Frosting Like A Pro
The hot spatula trick changed my entire relationship with frosting cakes. Run your offset spatula under hot water, dry it thoroughly, then smooth the frosting in long confident strokes. The heat melts the cream cheese just enough to create that professional glass finish.
- Make the silhouette the day before and store it between parchment paper in a cool spot
- Freeze the cake layers for 30 minutes before frosting to reduce crumbs
- Bring everything to room temperature before serving for the softest texture
 Pin It
 Every time I slice into this cake and reveal that red heart beneath the chocolate silhouette, I remember why I started baking in the first place. Here's to making something beautiful and sharing it with people who make your life sweeter.
Recipe FAQs
- → What makes the crumb so light and tender?
The combination of cake flour, buttermilk, and vinegar-activated baking soda creates an exceptionally tender crumb. The acidic ingredients react with baking soda for lift, while cake flour's lower protein content prevents toughness.
- → Can I make the chocolate silhouette ahead of time?
Absolutely. Prepare the dark chocolate silhouette up to a week in advance and store between sheets of parchment paper in an airtight container at room temperature. Handle gently when transferring to the frosted cake.
- → How do I achieve vibrant red color without thinning the batter?
Use gel-based food coloring rather than liquid. Gel colors deliver concentrated pigment with minimal liquid, preserving your batter's consistency while yielding that signature bright red hue.
- → Why must all ingredients be at room temperature?
Room-temperature butter, eggs, and buttermilk emulsify properly, creating a uniform batter that rises evenly. Cold ingredients can cause curdling or uneven baking, affecting texture and appearance.
- → Can I use round pans instead of heart-shaped?
Yes, two 9-inch round pans work perfectly. Adjust baking time to 23-27 minutes and check for doneness with a toothpick. The silhouette can still be centered on top for the same dramatic effect.
- → How long should the cake chill before serving?
Refrigerate for at least 30 minutes after decorating to set the frosting and chocolate silhouette. For cleanest slices, chill for 1-2 hours, then bring to room temperature for 15 minutes before serving.