 Pin It
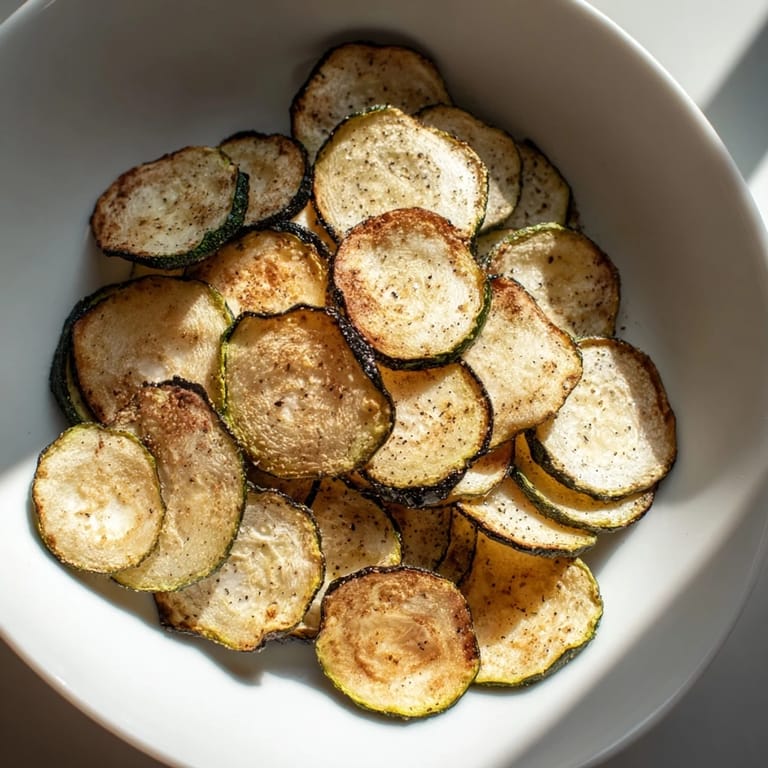
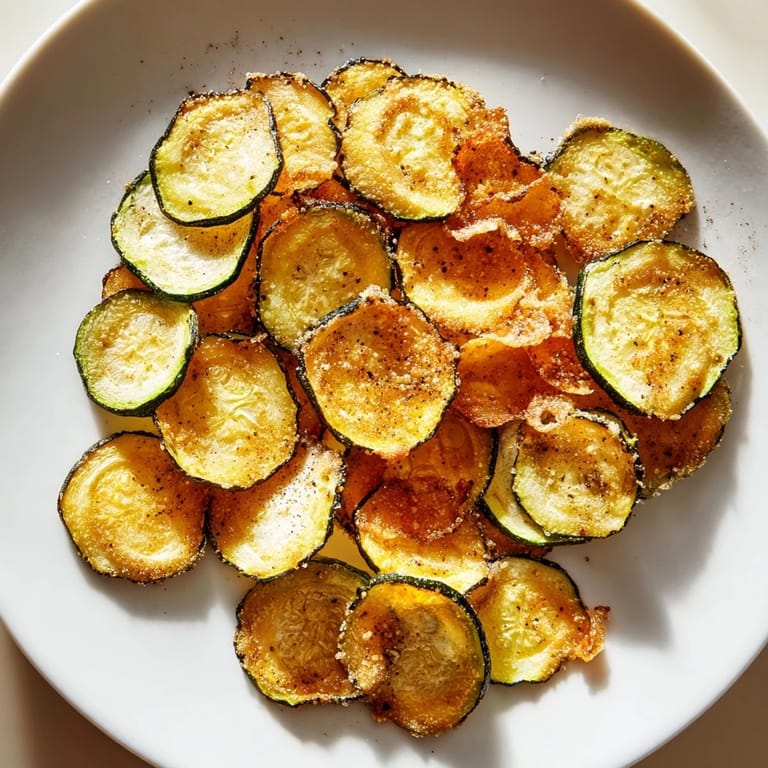
 My kitchen smelled like summer the afternoon I decided to stop throwing away zucchini and start crisping it instead. A neighbor had dropped off a basket of them, and instead of making the usual bread, I wondered what would happen if I treated them like potato chips—thin, golden, and impossibly crunchy. Two hours later, I was amazed at how a vegetable I'd always cooked soft could transform into something so satisfying to bite into. Now I make these whenever I need a snack that feels indulgent but actually isn't.
I brought a batch to my sister's place on a random Tuesday, and she sat on the porch eating them straight from the container while we talked about nothing in particular. By the time I left, half the batch was gone and she was asking for the recipe. That's when I realized these weren't just a way to use up garden vegetables—they'd become something people actually looked forward to.
Ingredients
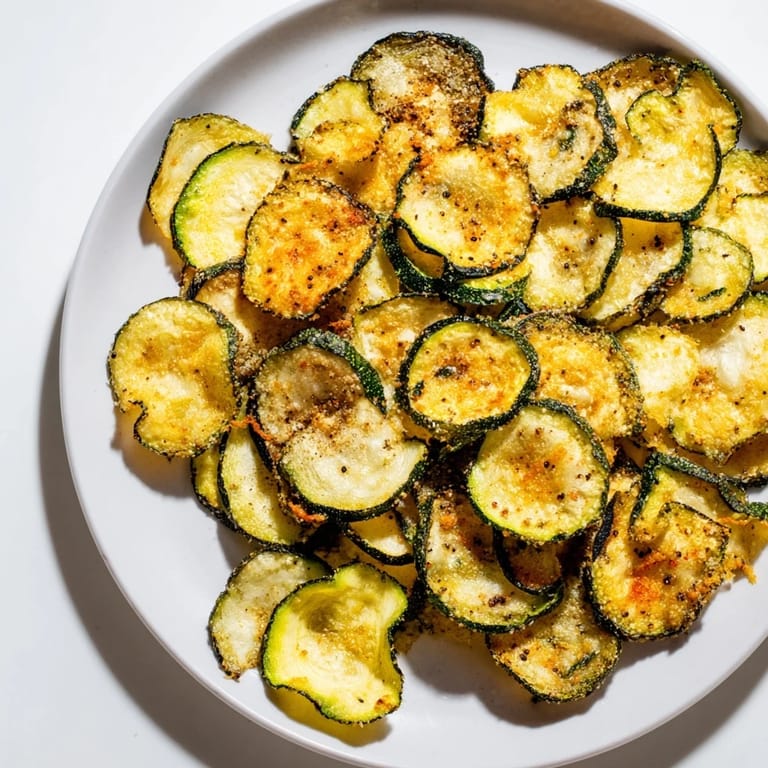
- Zucchini, 2 medium: Pick ones that are firm and straight, not waterlogged oversized monsters—they slice more evenly and dry faster in the oven.
- Olive oil, 1 tablespoon: Just enough to coat and help them crisp without making them greasy; use your good oil here because you'll taste it.
- Sea salt, 1/2 teaspoon: Coarse salt sticks better than fine salt and seasons more honestly.
- Freshly ground black pepper, 1/4 teaspoon: Fresh grinding makes a real difference in flavor, not the dusty stuff from old tins.
- Garlic powder, 1/2 teaspoon (optional): This is my usual move because garlic makes everything better, but skip it if you prefer pure zucchini flavor.
- Smoked paprika, 1/2 teaspoon (optional): Adds a warm, slightly smoky note that feels almost bacon-like.
Tired of Takeout? 🥡
Get 10 meals you can make faster than delivery arrives. Seriously.
One email. No spam. Unsubscribe anytime.
Instructions
- Heat your oven gently:
- Preheat to 225°F and line two large baking sheets with parchment paper. The low temperature is the secret—it dries the zucchini slowly instead of cooking it fast, which is what gives you that crisp.
- Prep your zucchini:
- Wash and dry them thoroughly, then slice as thin as you can manage—about 1/8 inch is perfect. A mandoline is your friend here, but a sharp knife works too if you're patient and careful.
- Remove the moisture:
- Pat each slice dry with paper towels; this step honestly makes or breaks the crispiness. Wet zucchini steams instead of crisps, and nobody wants that.
- Season everything:
- Toss the slices in a bowl with olive oil, salt, pepper, and whichever optional seasonings you're using. Make sure every piece gets coated.
- Arrange and bake:
- Spread the slices in a single layer on your sheets—no overlapping, or they'll steam where they touch. Bake for 1 hour, then rotate the sheets and flip each chip.
- Finish with time:
- Bake another 30 to 40 minutes until golden and crispy. Your nose will tell you when they're done—that toasted, nutty smell is the signal.
- Cool completely:
- This is important: leave them on the sheets after the oven turns off. They crisp up even more as they cool, and moving them too early can soften them.
 Pin It
 My son grabbed a handful straight from the cooling sheet one evening and actually paused mid-chew, surprised that something green and healthy could taste this good. That small moment felt like a win in a way that's hard to explain unless you're trying to sneak vegetables into someone's life.
Flavor Variations Worth Trying
Once you nail the basic version, the real fun starts. I've tested chili powder for a gentle heat, Italian seasoning for something herby and familiar, and nutritional yeast for a cheesy umami vibe that's honestly addictive. My latest experiment was a mix of smoked paprika and a tiny pinch of cumin, which gave them an almost barbecue chip quality. Each variation takes the same amount of time but feels like a completely different snack.
Storage and Keeping Them Crispy
These are best eaten the same day—I know that sounds strict, but there's a real reason. They absorb moisture from the air pretty quickly, which is why people swear they've gone soft. An airtight container helps them last a day or two, but the crunch is always best within hours of cooling. If you're planning ahead, these are so fast to make that baking a fresh batch is often easier than storing old ones.
Why This Became My Go-To Snack
There's something satisfying about turning a humble vegetable into something crispy and crave-worthy without any weird ingredients or complicated techniques. It's proof that simple things done right beat fancy things done halfway. I reach for these whenever I need a snack that feels real and tastes genuinely good, not like I'm settling.
- Make them on Sunday if you want easy snacking all week—just bake fresh batches every couple of days.
- Double the recipe without changing the baking time; just use more baking sheets and rotate them more often.
- Parmesan cheese sprinkled on before baking is the lazy person's upgrade that actually works.
 Pin It
 These chips remind me that the best snacks don't have to be complicated or full of things you can't pronounce. Just good vegetables, a little patience, and the magic of low, slow heat.
Recipe FAQs
- → How to ensure zucchini chips get crispy?
Slice the zucchini thinly and pat dry to remove moisture, then bake in a single layer at low heat for a long time, flipping halfway through.
- → Can I add other seasonings?
Yes, ingredients like smoked paprika, garlic powder, chili powder, or Parmesan cheese can enhance flavor and crispiness.
- → What oven temperature is ideal?
225°F (110°C) is recommended for slow baking to achieve a crunchy texture without burning.
- → How to store leftover chips?
Keep them in an airtight container at room temperature and consume within two days for best crunch.
- → Are these suitable for gluten-free diets?
Yes, the ingredients used are naturally gluten-free; just check seasoning blends if using packaged spices.