 Pin It
 I discovered these by accident one Friday night when I was running late to a dinner party and didn't have time to assemble a proper charcuterie board. Instead of slicing everything thin and arranging it carefully, I tossed some salami and cheddar onto a baking sheet, thinking I'd just warm them up. Ten minutes later, the kitchen smelled incredible—crispy, salty, almost smoky—and when I pulled them out, they'd transformed into these impossibly thin, shatteringly crisp chips that tasted like concentrated versions of themselves. My guests couldn't stop eating them.
The first time I made them deliberately was for a wine tasting at my apartment, and I remember panicking halfway through baking because the cheese was bubbling so aggressively I thought it was burning. But when it cooled, it had turned into these golden, crispy lace-like chips that caught the light. Everyone assumed I'd spent hours on them, and I just smiled and let them think that.
Ingredients
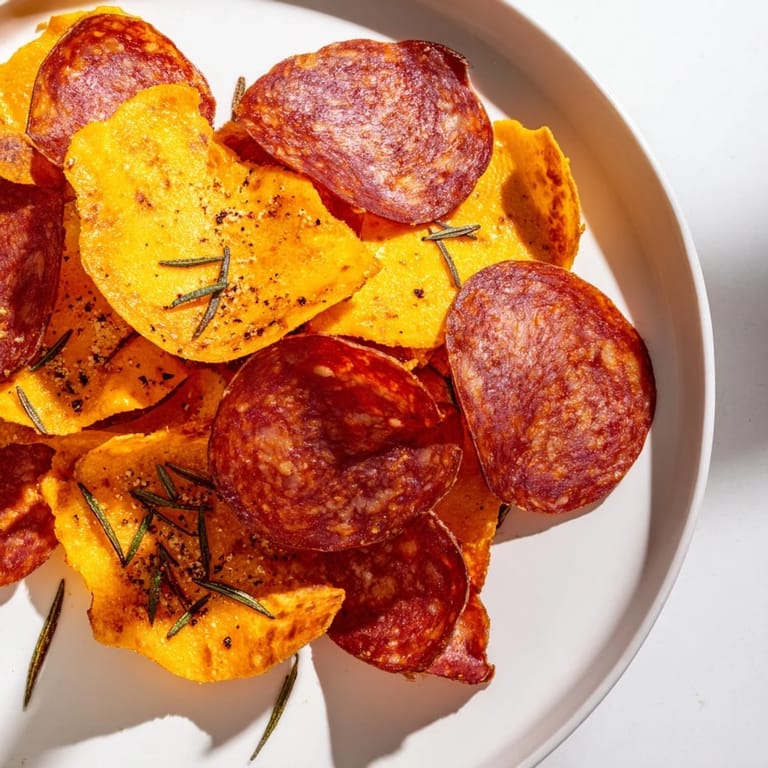
- Salami, thinly sliced (100g): The thinner you slice it, the crispier and more flavorful the chip becomes—ask your butcher to use the meat slicer if you don't have one at home.
- Prosciutto, thinly sliced (100g): It crisps up differently than salami because of its delicate texture, so watch it carefully to catch that perfect moment before it burns.
- Pepperoni, thinly sliced (100g): Choose good quality pepperoni with visible fat marbling; it renders out as it bakes and creates the most incredible flavor.
- Hard aged cheese like cheddar, Manchego, or Parmesan (100g): These varieties melt into crispy chips rather than gooey puddles, which is exactly what you want.
- Semi-hard cheese like Gouda or provolone (100g): These add richness and a slightly different texture, creating variety on your final platter.
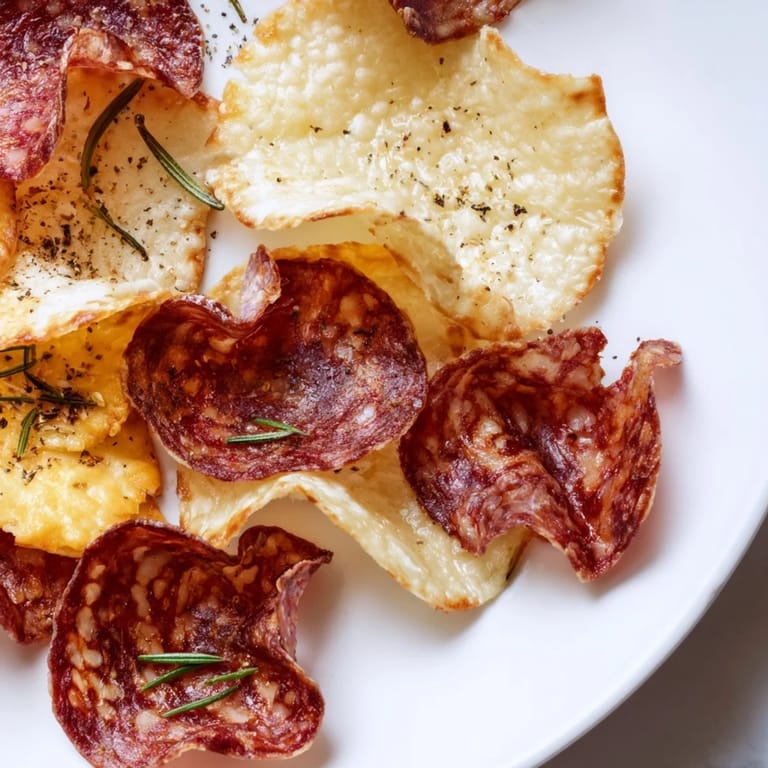
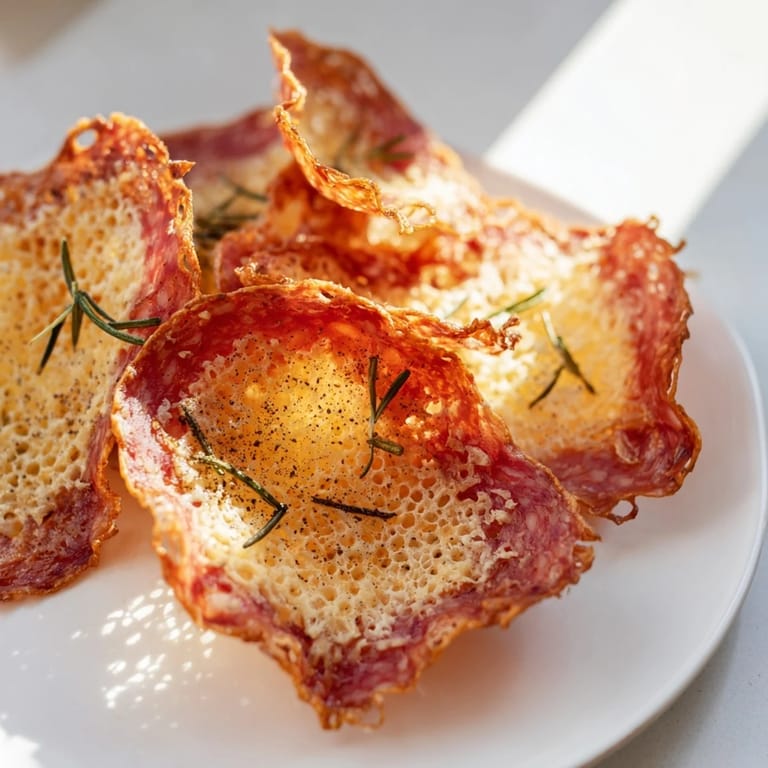
- Fresh herbs like thyme or rosemary, finely chopped (optional): A pinch scattered on the cheese before baking adds an unexpected herbaceous note that guests will ask about.
- Cracked black pepper (optional): A generous sprinkle brings out the natural saltiness of both the meats and cheese.
Tired of Takeout? 🥡
Get 10 meals you can make faster than delivery arrives. Seriously.
One email. No spam. Unsubscribe anytime.
Instructions
- Heat your oven and prep:
- Get your oven to 375°F and line two separate baking sheets with parchment paper—this matters because meat and cheese bake at different speeds.
- Arrange the meat slices:
- Lay the salami, prosciutto, and pepperoni in a single layer on one sheet without overlapping; if they touch, they'll stick together and won't crisp evenly.
- Prepare the cheese:
- Space the cheese slices on the second sheet so there's a bit of room between each one—they'll spread slightly as they melt.
- Add optional seasonings:
- If you're using herbs or pepper, sprinkle them on the cheese now; they'll toast slightly and intensify in flavor.
- Bake the meat chips:
- Put the meat sheet in first and bake for 8–10 minutes until the edges are crisp and just starting to brown around the corners. You'll smell when they're getting close—that's your cue to check.
- Bake the cheese chips:
- Once the meat is out, pop the cheese in and bake for 6–8 minutes until it's golden and just barely bubbling; this is when the magic happens. Remove it and let it cool for 5 minutes before you gently lift the chips off the parchment with a spatula.
- Cool and serve:
- Let everything cool completely on the baking sheets—the chips will crisp up even more as they cool. Arrange them on a platter and serve immediately while they're still crackling.
 Pin It
 I made these for my partner's family gathering, and watching his grandmother pick one up, close her eyes, and say it tasted exactly like a memory from her childhood in Spain was the moment I realized these weren't just snacks—they were edible nostalgia that somehow felt entirely new.
The Art of the Thin Slice
The difference between chips that are truly crispy and ones that stay chewy comes down entirely to thickness. When you're at the deli counter, ask them to slice everything paper-thin—thinner than you think you need. This maximizes surface area, which means more browning and faster crisping. I've learned that a meat slicer at home is a worthwhile investment if you make these regularly, because hand-slicing never gets them quite thin enough no matter how sharp your knife is.
Flavor Combinations Worth Trying
Once you understand the basic formula, you can play with varieties you love. I've experimented with smoked salami, Spanish chorizo that's spicy, creamy Brie (which needs less baking time), and aged Gouda that tastes almost caramel-sweet when crisped. The beauty of this recipe is that it adapts to whatever cured meats and cheeses are in your kitchen or look good at the market on any given day.
Storage and Next-Day Eating
Leftovers will stay crispy in an airtight container at room temperature for a couple of days, though honestly they rarely last that long in my house. If they do soften, you can re-crisp them in a 325°F oven for just 2–3 minutes, and they bounce right back to their original crackling texture. I love having them on hand as a quick protein snack, and they pair beautifully with olives, pickles, or a glass of wine if you're recreating the full charcuterie experience.
- Make these ahead of time for parties and store them in a flat container so they don't get crushed.
- Experiment with pairing them with different drinks—they're incredible with sparkling wine, light reds, or even a cold beer.
- Double the batch if you're serving more than four people; they disappear faster than you'd expect.
 Pin It
 These chips transformed the way I think about entertaining—they're proof that the best dishes often come from happy accidents and that sometimes the most impressive thing you can serve is something so simple it barely feels like cooking. Make them when you want to feel fancy without the stress.
Recipe FAQs
- → What types of meats work best for charcuterie chips?
Thinly sliced cured meats like salami, prosciutto, and pepperoni work best, as they crisp nicely without drying out.
- → How do I prevent cheese chips from sticking to the parchment paper?
Use parchment paper and space cheese slices apart to allow air circulation. Let cheese chips cool slightly before lifting to ensure they firm up.
- → Can I add herbs or spices to enhance flavor?
Yes, sprinkling fresh herbs such as thyme or rosemary and cracked black pepper before baking adds extra aroma and flavor.
- → What is the best way to store leftover chips?
Store leftovers in an airtight container at room temperature for up to two days to maintain crispness and flavor.
- → Are there recommended pairings for these charcuterie and cheese chips?
Pair well with olives, pickles, or a light red wine to complement the savory and rich flavors.