 Pin It
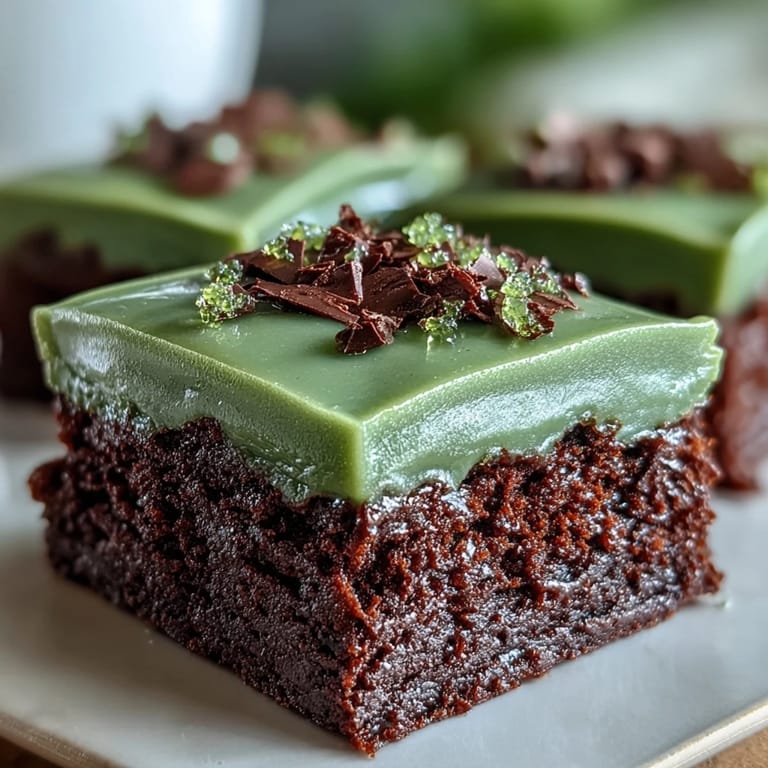
 My kitchen smelled like chocolate and possibility the first time I attempted these shamrock brownies, though I'll admit my initial batch looked more like lumpy rectangles than festive shamrocks. A friend suggested I grab a proper cookie cutter instead of trying to carve them freehand with a knife, and suddenly everything clicked—the way the emerald icing caught the light, how people's faces lit up when they realized these weren't just any brownies. Now every March, I find myself melting butter and reaching for that worn shamrock cutter, knowing exactly how the evening will unfold.
There's this moment every St. Patrick's Day when I pull the cooling brownies from the pan and my roommate wanders over, drawn by the smell, and I hand her a shamrock still warm from the cutter. That gesture, pressing a piece of chocolate into someone's hand and watching their expression shift from curiosity to delight, is when I remember why I keep making these year after year.
Ingredients
- Unsalted butter (1/2 cup): Use good quality butter here since it's a small amount and makes a noticeable difference in the brownie's richness and texture.
- Granulated sugar (1 cup): This sweetens everything while helping create that desirable fudgy crumb structure as it dissolves into the eggs.
- Large eggs (2): These bind the mixture and add moisture—room temperature eggs mix more smoothly, though cold ones work if you're in a hurry.
- Vanilla extract (1 teaspoon for brownies, 1/2 teaspoon for icing): This brightens the chocolate flavor and keeps the icing from tasting one-dimensional.
- Unsweetened cocoa powder (1/3 cup): Don't skimp on quality here—it's your chocolate foundation and really determines the brownie's depth.
- All-purpose flour (1/2 cup): Just enough to hold everything together without making them cakey or dense.
- Salt (1/4 teaspoon): This tiny amount amplifies the chocolate flavor and balances the sweetness beautifully.
- Baking powder (1/4 teaspoon): A light lift that keeps them fudgy rather than heavy, though the amount is small and forgiving.
- Powdered sugar (1 1/2 cups for icing): The base of your icing, and sifting it prevents lumps that stick around no matter how much you stir.
- Softened butter for icing (2 tablespoons): Room temperature matters here so it creams smoothly with the sugar into something spreadable.
- Milk (2 tablespoons): Adjusts the icing consistency—add it gradually and you can always add more but can't take it out.
- Green food coloring: Add it drop by drop because the color intensifies as you mix, and it's easy to overshoot into artificial-looking territory.
Tired of Takeout? 🥡
Get 10 meals you can make faster than delivery arrives. Seriously.
One email. No spam. Unsubscribe anytime.
Instructions
- Prep your pan and preheat:
- Get your oven heating to 350°F and line that 8x8-inch pan with parchment paper, leaving some overhang so you can lift the whole thing out later without wrestling it. This step saves your sanity during cleanup.
- Melt and mix the base:
- Warm the butter in a saucepan just until it's liquid, then remove it from heat and stir in sugar, eggs, and vanilla until everything looks smooth and combined. You want the mixture slightly warm so the sugar dissolves rather than staying gritty.
- Add dry ingredients gently:
- Sift the cocoa powder, flour, salt, and baking powder right into the wet mixture and stir until just combined—this is where patience pays off because overmixing creates tough brownies instead of fudgy ones. Stop mixing the moment you don't see any white streaks of flour.
- Bake until just done:
- Pour the batter into your prepared pan and smooth the top, then bake for 25 to 30 minutes until a toothpick comes out with a few moist crumbs clinging to it. The brownies will keep cooking slightly as they cool, so it's better to underbake than overbake here.
- Cool completely before cutting:
- Leave the brownies in the pan on a wire rack until they're completely cool to the touch—this gives them time to set up so your shamrock cutouts have clean edges. Trying to cut warm brownies will just create sad, crumbly edges.
- Make your icing:
- While brownies cool, beat together softened butter, powdered sugar, milk, and vanilla until you have something creamy and spreadable. Add green food coloring drop by drop, mixing between additions so you hit that perfect shamrock green without turning them into radioactive swamps.
- Cut and frost:
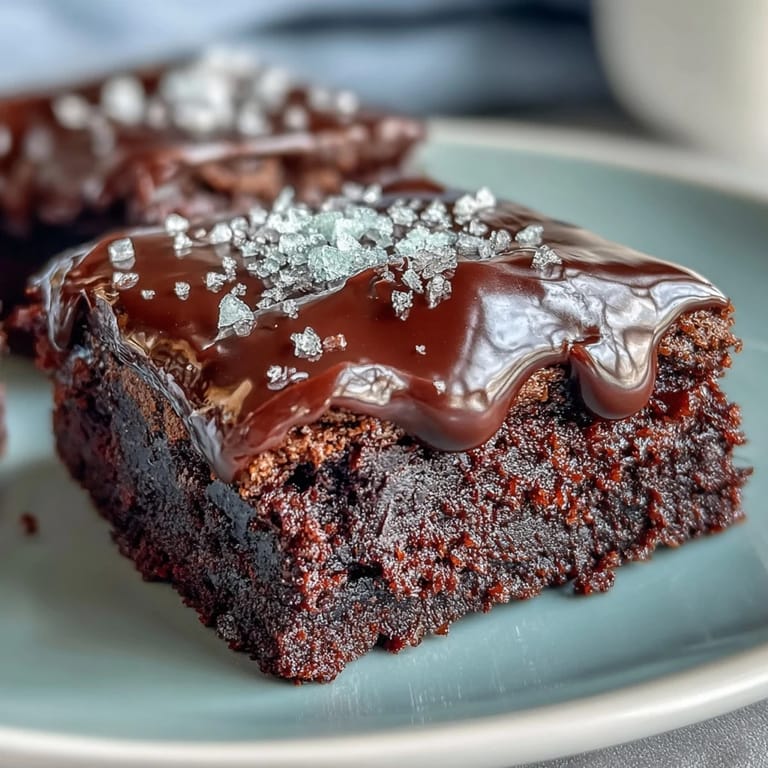
- Lift the cooled brownies from the pan and use your shamrock cutter to create perfect shapes—wipe the cutter clean between cuts so you get sharp edges. Spread icing generously over each shamrock and top with sprinkles if you're feeling fancy.
 Pin It
 The first time a kid at a St. Patrick's Day party saw one of these brownies, they actually gasped—not because brownies are rare, but because someone had bothered to make them look special. That's when I realized this recipe isn't just about chocolate and green icing; it's about showing up for people, even in small ways.
Making Them Ahead
You can bake the brownies up to two days ahead and store them unfrosted in an airtight container, then frost them the morning of your celebration or party. This approach actually works beautifully because you only have to focus on one task at a time, and the icing goes on smoother when you're not rushed or tired from baking.
Flavor Variations Worth Trying
Beyond the basic recipe, there's room for creativity—I've stirred mini chocolate chips into the batter, added a tablespoon of espresso powder to deepen the chocolate flavor, and even swirled a bit of peppermint extract into the icing for holiday versions. Each variation keeps the same structure but gives you a reason to make them again, and your taste buds remember the subtle differences.
Storage and Serving Tips
These brownies taste best at room temperature because the chocolate stays tender and the icing has that perfect texture, though they'll keep for three days in an airtight container. If you're transporting them to a party or potluck, frost them close to serving time so the icing doesn't crack during the move.
- Cut them fresh or store unfrosted brownies and frost them when you're ready to serve or gift them.
- If the icing gets too soft during warm weather, pop the brownies in the fridge for 15 minutes before transporting.
- Double the icing recipe if you like generous, thick coatings instead of thin ones.
 Pin It
 There's something deeply satisfying about pulling these brownies out to share, knowing you made something that tastes as good as it looks. In just about an hour, you've created something that makes people smile—and honestly, that's all the St. Patrick's Day luck you really need.
Recipe FAQs
- → How do I prevent the brownies from drying out?
Avoid overbaking by checking with a toothpick at 25 minutes; it should come out with a few moist crumbs.
- → Can I make the green icing ahead of time?
Yes, prepare the icing in advance and store it covered at room temperature before applying to the brownies.
- → What’s the best way to cut the shamrock shapes?
Use a metal shamrock cookie cutter for clean edges and wipe it between cuts to prevent sticking.
- → Can I add nuts or chips to the brownies?
Yes, mix mini chocolate chips or chopped nuts into the batter for added texture and flavor.
- → How should these brownies be stored?
Store in an airtight container at room temperature for up to three days to maintain freshness.