 Pin It
 My grandmother kept a worn notebook filled with pierogi recipes, each one annotated with tiny pencil marks and water stains from decades of kitchen use. One afternoon, she pressed it into my hands and said, "These aren't just dumplings—they're how we remember home." I stood in her kitchen watching her work, the dough soft beneath her practiced hands, and suddenly understood why she'd spent so many winter evenings folding and sealing. Now when I make them, I'm not just cooking; I'm keeping a conversation alive across generations.
I first made these for a dinner party when I was too nervous to try anything fancy, thinking homemade dumplings seemed safer than soufflés. My friends went quiet the first bite—not from disappointment, but recognition. One of them had a Polish mother and hadn't eaten pierogi in years; watching his face soften was worth every minute of folding. That night, the recipe stopped being borrowed from my grandmother and became my own.
Ingredients
- All-purpose flour: The backbone of tender dough; sour cream in the dough itself is the secret to a texture that's pillowy rather than dense.
- Egg and sour cream: Together they create elasticity and that subtle tang that makes the dough taste less generic and more alive.
- Russet potatoes: Starchy and creamy when mashed, they won't turn gluey like waxy potatoes do.
- Farmers cheese or ricotta: Use farmers cheese if you can find it; ricotta works but needs extra draining or the filling becomes weepy.
- Sharp cheddar: Don't skip this—it adds depth that mild cheese can't deliver.
- Onions for filling and serving: The filling onions add savory sweetness; the caramelized ones are where magic happens, so don't rush this step.
- Sour cream for serving: Non-negotiable; it's the cool counterpoint to everything warm and rich.
Tired of Takeout? 🥡
Get 10 meals you can make faster than delivery arrives. Seriously.
One email. No spam. Unsubscribe anytime.
Instructions
- Mix and knead the dough into silky submission:
- Combine flour and salt, then make a well and add your egg, melted butter, sour cream, and water. The mixture will look shaggy at first—this is normal and slightly unnerving. Knead for 5–7 minutes until it becomes smooth and elastic enough to hold its own shape. The resting period is crucial; 30 minutes lets the gluten relax so rolling becomes effortless rather than a wrestling match.
- Build the filling with intention:
- Boil cubed potatoes until they fall apart easily, then drain thoroughly because watery filling ruins everything. While they're cooking, sauté your chopped onion in butter until golden—this is when your kitchen starts smelling like something worth doing. Mash the potatoes, fold in the sautéed onion, then add both cheeses and season generously. Let it cool completely or you'll burn your fingers sealing the pierogi.
- Roll, cut, and seal with care:
- Roll the dough thin—about the thickness of a dime—which sounds fragile but holds up beautifully. A 3-inch cutter works perfectly, and if you don't have one, a glass works just as well. Place a heaping teaspoon of filling in each circle's center, fold into a half-moon, and pinch the edges firmly so they don't burst open during boiling.
- Boil until they float, then a moment longer:
- Gently lower pierogi into simmering salted water and wait for them to float to the surface—this takes 3–5 minutes. Once they float, give them another minute or two to cook through. This gentle boiling is what keeps them tender, not rubbery.
- Caramelize onions with patience:
- This step cannot be rushed without consequence. Melt butter over medium-low heat, add thinly sliced onions, and stir occasionally for 20–25 minutes until they're deeply golden and taste almost sweet. The reward for this patience is flavor that elevates everything else on the plate.
- Pan-fry to golden crispness:
- In the same skillet, add boiled pierogi in a single layer and fry until the bottoms turn crispy and brown, about 2–3 minutes per side. You're not cooking them through—you're adding texture and deepening flavor.
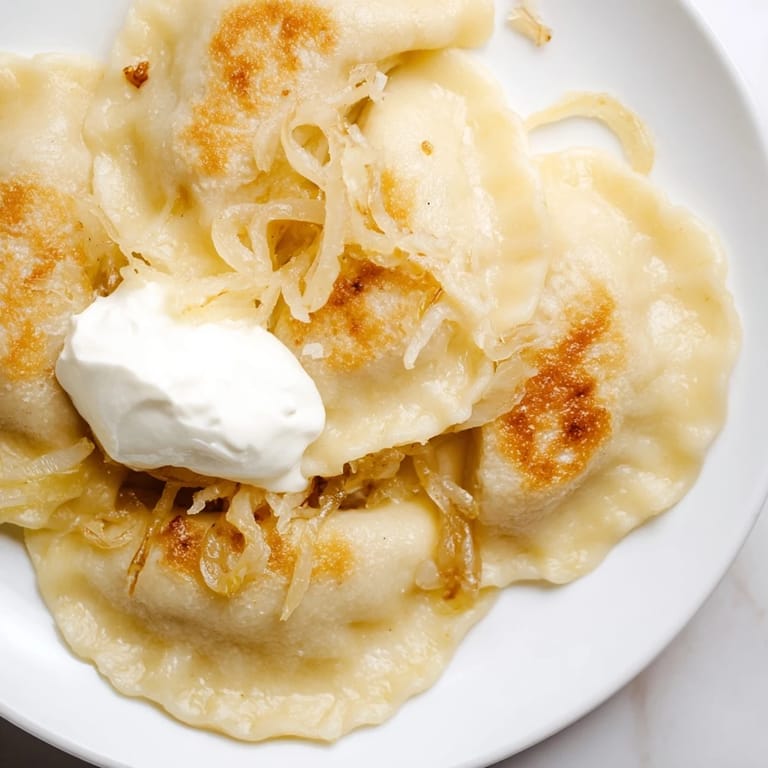
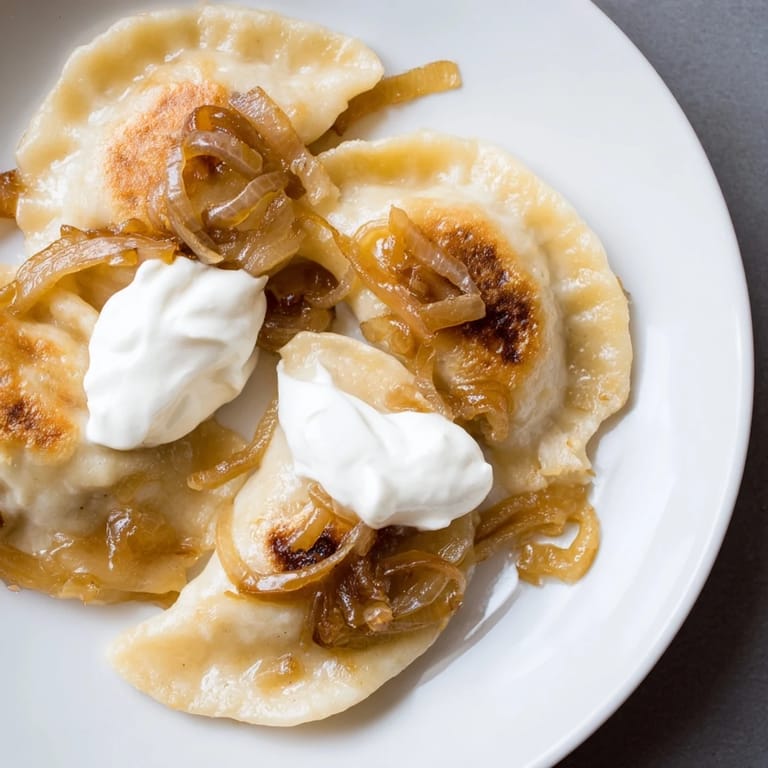
- Assemble and serve warm:
- Stack your pierogi on a plate, pile caramelized onions on top, add a generous dollop of sour cream, and scatter with fresh chives or parsley if you have them.
 Pin It
 Years after my grandmother passed, I served these pierogi to someone who had never tried them before, and they asked if I could teach them how to make them. Teaching someone to fold pierogi the way my grandmother taught me turned out to be the closest thing to bringing her back into the kitchen. The recipe had become a way to keep her present, and sharing it became a way to let her live on in someone else's hands.
Freezing and Make-Ahead Magic
Uncooked pierogi freeze beautifully for up to 2 months, which means you can make a massive batch on a calm weekend and pull them out whenever you need comfort food or want to impress someone. Just freeze them in a single layer on a baking sheet, then transfer them to a freezer bag once solid. Cook them straight from frozen—they'll take an extra minute or two in the boiling water, which is a small price for having homemade dumplings on demand.
Playing with the Formula
While potato and cheese is the classic, pierogi dough is forgiving enough to hold countless fillings. Some people swap the farmers cheese for well-drained cottage cheese if they can't find the real thing. The vegetarian version I make is as it stands, but I've heard stories of bacon lardons stirred into the caramelized onions for those who eat meat. The dough itself is what matters most—everything else is just variation on a theme.
Serving and Pairing Suggestions
Pierogi can stand alone as a meal, or you can serve them alongside a simple salad or roasted vegetables to make it feel more complete. They pair surprisingly well with crisp Polish lager or a dry white wine, which cuts through the richness and makes the whole meal feel less heavy than you'd expect. I've served them at casual weeknight dinners and at celebrations, and they work equally well in both contexts—proof of their versatility.
- Serve them hot; cold pierogi lose their charm almost immediately.
- Make extra caramelized onions because people always want more than you think.
- A dollop of sour cream isn't optional—it's essential to the whole experience.
 Pin It
 Making pierogi is less about following instructions and more about understanding why each step matters—the resting dough, the drained potatoes, the patient onions. Once you grasp that, you stop worrying about getting it perfect and start enjoying the rhythm of it, the way your hands remember the motion of folding even when your mind forgets everything else.
Recipe FAQs
- → What type of cheese works best for the filling?
Farmers cheese or well-drained ricotta paired with sharp cheddar creates a creamy, flavorful filling that holds well inside the dough.
- → How do I prevent the dough from sticking?
Knead the dough until smooth and elastic, then rest it covered to relax gluten. Dust your surface and rolling pin with flour when shaping.
- → What is the best way to cook pierogi evenly?
Boil them in salted water until they float, then pan-fry on both sides until golden and crisp for an appealing texture contrast.
- → How should onions be prepared for serving?
Thinly sliced onions cooked slowly in butter until deeply golden caramelized, imparting a sweet aroma and rich flavor.
- → Can pierogi be frozen for later use?
Yes, uncooked pierogi can be frozen on trays to prevent sticking, then transferred to bags and stored up to two months.