 Pin It
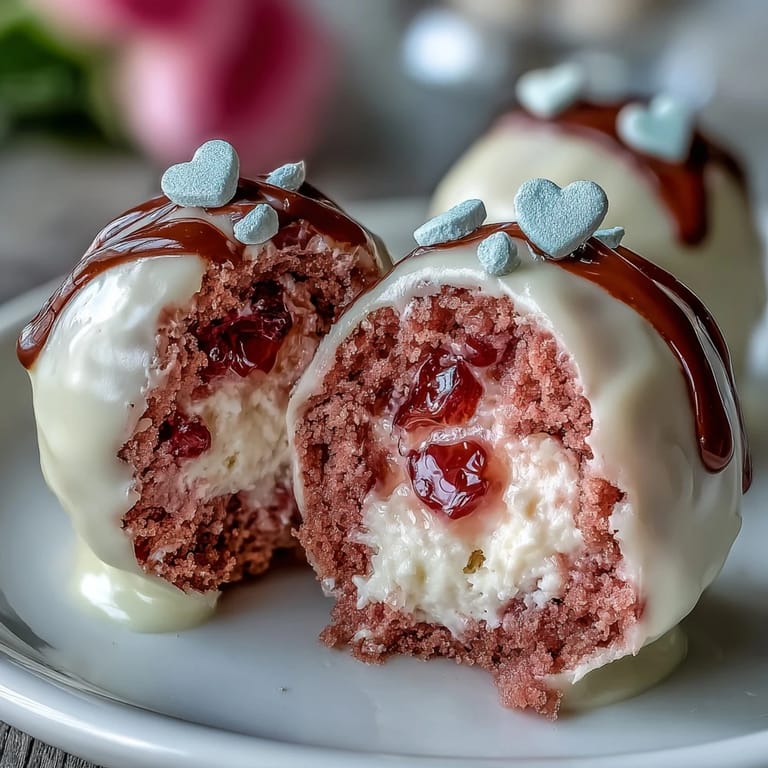
 My neighbor showed up at my door with a box of cake pops last February, and I was instantly smitten. They were this perfect shade of dusty pink, dipped in white chocolate, and when I bit into one, the cream cheese frosting hit differently than any frosting I'd had before. That night, I decided I had to figure out how to make them myself, not just for the dessert but for the excuse to hand them to people I care about. These pink velvet cake pops became my love language in edible form.
I made these for a Valentine's Day potluck at work, terrified they'd fall apart during transport. But something magical happened when my coworker bit into one and closed her eyes for a moment. She didn't say anything fancy, just asked if I'd make them again. That's when I realized these aren't just cake pops, they're little moments of connection wrapped in chocolate.
Ingredients
- All-purpose flour: The structure of your cake, and measuring by weight here really does make a difference in how your crumb holds together.
- Granulated sugar: Sweetness combined with the cocoa creates that signature velvet depth you can't get any other way.
- Unsweetened cocoa powder: This is the secret ingredient that makes pink velvet cake distinct from regular pink cake, giving it that subtle chocolate undertone.
- Baking soda: Works with the vinegar to create tenderness and that soft crumb that holds frosting beautifully when crumbled.
- Salt: A pinch makes everything taste more like itself, trust me on this.
- Buttermilk: Keeps the cake moist and tender, room temperature matters because cold ingredients don't mix as smoothly.
- Unsalted butter: Room temperature is non negotiable here, or your frosting will be grainy.
- Eggs: Also room temperature, for the same reason, and add them one at a time so they actually incorporate.
- Vanilla extract: Pure vanilla makes a noticeable difference in flavor depth.
- White vinegar: Reacts with baking soda and adds a subtle tang that brightens everything.
- Pink gel food coloring: Gel is so much more reliable than liquid, and a little goes a long way.
- Cream cheese: Softened, because cold cream cheese will never whip smoothly, and the tanginess is essential to balance sweetness.
- Powdered sugar: Sift it before adding or you'll have lumpy frosting that tastes gritty.
- White chocolate or candy melts: Candy melts are easier to work with because they set faster, but real white chocolate tastes noticeably better.
- Cake pop sticks: Get decent quality wooden ones, the cheap ones can splinter.
Tired of Takeout? 🥡
Get 10 meals you can make faster than delivery arrives. Seriously.
One email. No spam. Unsubscribe anytime.
Instructions
- Set up your baking space:
- Preheat your oven to 350°F and grease an 8-inch square pan, then line it with parchment so your cake slides right out later. This step takes 3 minutes but saves so much frustration.
- Build your dry foundation:
- Whisk together flour, sugar, cocoa powder, baking soda, and salt in a medium bowl. Whisking instead of stirring incorporates air and breaks up any lumps so your cake comes out tender.
- Cream your butter until it's fluffy:
- In a separate large bowl, beat softened butter for a minute or two until it looks lighter in color and airy. This traps tiny air bubbles that help your cake rise.
- Add your eggs one at a time:
- Drop in one egg, mix it completely, then add the next. Vanilla and vinegar go in now too, stirring until everything is pale and thick.
- Alternate your wet and dry ingredients:
- Start with some dry mixture, then some buttermilk, then dry again, ending with dry. This keeps your batter from getting overmixed and tough.
- Color your batter:
- Add pink gel food coloring a little at a time, stirring until the color is vibrant and even throughout. The amount you use depends on how pink you want it to be.
- Bake until a toothpick comes out clean:
- Pour into your pan and bake for 22 to 25 minutes, watching for when a toothpick inserted in the center has just a few crumbs on it. Let it cool completely before moving on.
- Make your frosting:
- Beat softened cream cheese and butter until smooth, then gradually add sifted powdered sugar and vanilla, beating until fluffy and light. This should take about 2 to 3 minutes of actual beating.
- Crumble and combine:
- Break your cooled cake into fine crumbs, then fold in the frosting until the mixture sticks together when you press it. It should feel like moist cookie dough.
- Roll into balls:
- Roll the mixture into 1-inch balls and arrange them on a parchment-lined baking sheet. You should get about 24, and they don't need to be perfect because white chocolate covers any imperfections.
- Chill for 30 minutes:
- Pop your balls into the fridge while you prepare everything else. Cold balls hold their shape much better when you dip them in chocolate.
- Melt your chocolate carefully:
- Microwave white chocolate in 20-second bursts, stirring between each one so it melts smoothly without seizing. If you use chocolate chips instead of melts, add a tiny bit of coconut oil or shortening to thin it out.
- Secure your sticks:
- Dip the tip of each stick into melted chocolate and push it about halfway into a cake ball. Chill for 10 more minutes so the chocolate acts like glue.
- Dip and decorate:
- One at a time, dip each cake pop into the melted chocolate, let excess drip off, then immediately add sprinkles or candies while the coating is still wet. Work quickly because the coating sets fast.
- Let them set upright:
- Place each finished cake pop upright in a styrofoam block or cake pop stand until the chocolate is completely set. This takes about 30 minutes and gives you a clean, professional look.
 Pin It
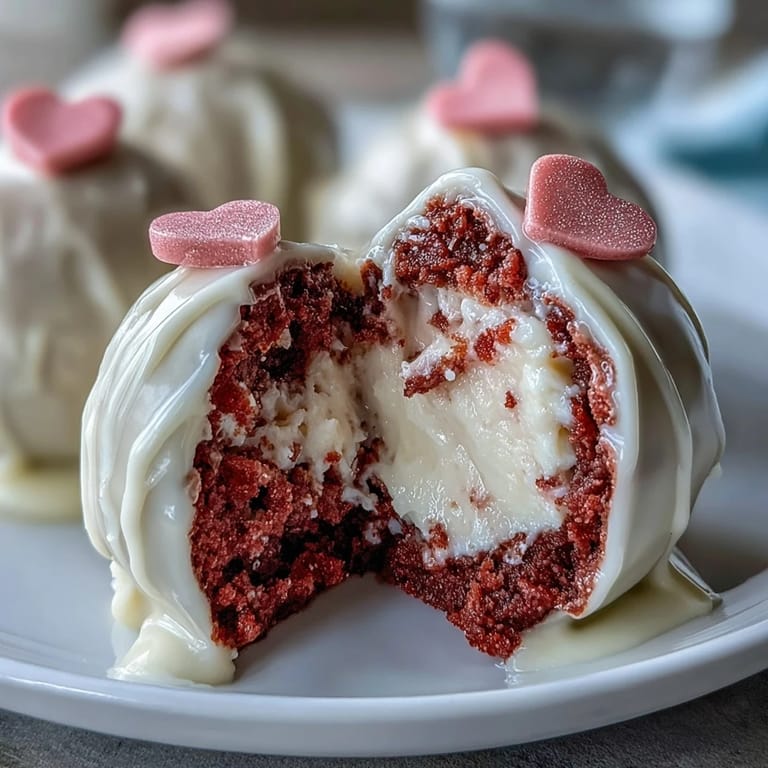
 I made a batch for my best friend's birthday party, and she cried a little when she saw them because they reminded her of that night at the Valentine's potluck. Sometimes the smallest gestures become the things people remember.
The Pink Velvet Difference
Pink velvet cake sits somewhere between red velvet and regular cake, and that cocoa powder is what makes it special. It's subtle, not chocolatey, just enough to deepen the flavor and make the pink look richer. The first time I made these, I skipped the cocoa thinking pink meant pure and sweet, and the result was one-dimensional. That cocoa changed everything, adding complexity that made people pause and actually taste what was in their mouth instead of just eating another sweet.
Why Cream Cheese Frosting Works Here
Buttercream is fine, but cream cheese frosting is what takes these from cute to crave-worthy. The tang cuts through the sweetness of the white chocolate coating and creates this balance that keeps you reaching for another one. It also holds up better in warmer weather and tastes fresher, which matters when you're making these a day or two ahead.
Making Them Your Own
Once you make these once, you'll start experimenting, and that's the whole point. I've tried dark chocolate coatings with contrasting white chocolate drizzles, strawberry candy melts mixed with white chocolate, and even added a tiny pinch of freeze-dried strawberry powder to the frosting. The base recipe is solid enough to handle whatever you want to throw at it.
- Store finished cake pops in an airtight container in the refrigerator for up to 5 days, and they taste even better on day two.
- If you're making these for an event, prep everything except the final chocolate dipping the day before, then assemble and decorate on the morning of.
- A styrofoam block works great, but you can also use a clean flower vase or even a bowl filled with oasis foam wrapped in tissue paper.
 Pin It
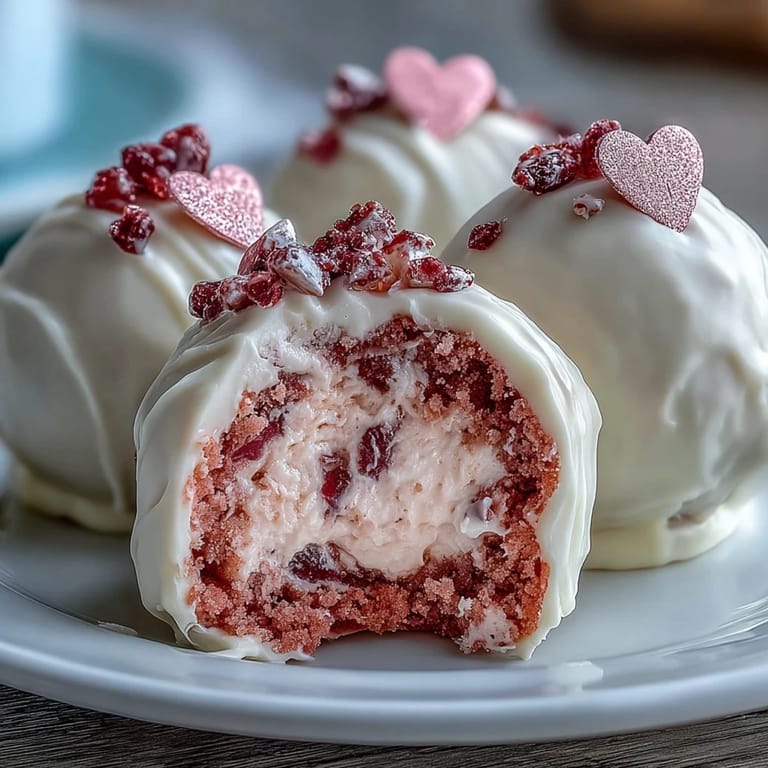
 These cake pops are proof that something simple and beautiful doesn't need to be complicated. Hand them out with no apology, because the people who receive them will understand what you're saying.
Recipe FAQs
- → How do I achieve the vibrant pink color in the cake?
Use 1–2 teaspoons of pink gel food coloring added to the batter to ensure a bright and even hue throughout the cake.
- → Can I substitute the white chocolate coating?
Yes, you can use dark chocolate or strawberry-flavored candy melts for a different flavor and appearance.
- → What is the best way to ensure cake pops hold together?
Mix crumbled cake thoroughly with the cream cheese frosting until it holds its shape when pressed, then chill before dipping.
- → How should cake pops be stored to maintain freshness?
Store them in an airtight container in the refrigerator for up to five days to keep them fresh and flavorful.
- → Are there any common allergens in these cake pops?
These contain gluten, eggs, and dairy. Also, check candy melts for soy content if sensitive.