 Pin It
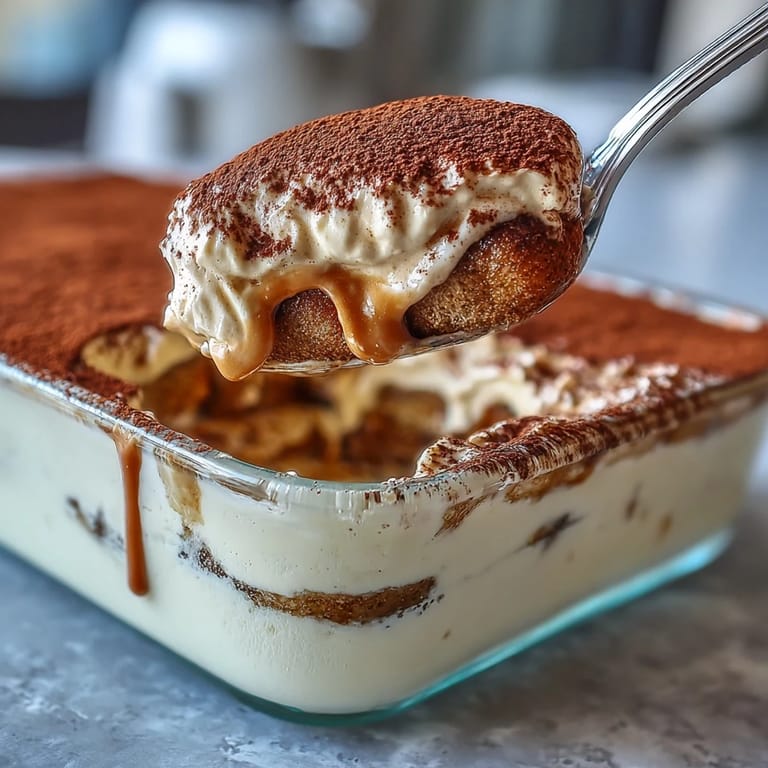
 The first time I encountered hojicha tiramisu was at a tiny dessert café in Kyoto where the owner served it in mismatched vintage china. That roasted, nutty tea flavor cutting through the sweet cream felt like discovering something both ancient and entirely new. I went back three times that week, trying to reverse-engineer the balance in my head. Now it has become my go-to dinner party finale because nobody expects it.
Last autumn I made this for my friend who claims to dislike tiramisu because coffee is too bitter for her. She took one hesitant bite, eyes went wide, and immediately asked for the recipe. Watching someone reconsider a lifelong food opinion is one of the best feelings in cooking.
Ingredients
- 2 cups water: Start with cold filtered water for the cleanest tea flavor
- 3 tablespoons hojicha loose leaf tea: The loose leaves give better flavor than bags but either works perfectly
- 2 tablespoons sugar for syrup: Adjust slightly if your hojicha is particularly smoky
- 3 large egg yolks: Room temperature eggs incorporate more smoothly into the cream
- 1/2 cup granulated sugar: This sweetness balances the earthiness of the tea
- 1 cup heavy cream: Cold cream whips faster and holds air better
- 8 oz mascarpone cheese: Let it soften completely to avoid lumps in your final cream
- 1 teaspoon vanilla extract: Pure vanilla makes the cream taste more complex
- 24 to 30 ladyfinger biscuits: Soft ones absorb more syrup while crisp ones give better texture
- Cocoa powder or hojicha powder: The finish matters visually and for that final layer of flavor
Tired of Takeout? 🥡
Get 10 meals you can make faster than delivery arrives. Seriously.
One email. No spam. Unsubscribe anytime.
Instructions
- Brew the hojicha syrup:
- Bring your water to a full boil then add the tea leaves and let them steep for exactly 5 minutes to extract that roasted flavor without bitterness
- Sweeten and cool the liquid:
- Strain out the leaves while the tea is still hot and stir in the sugar until it dissolves completely, then set it aside to reach room temperature
- Prepare the egg yolk base:
- Whisk the yolks and sugar together over simmering water for 5 to 7 minutes until the mixture turns pale and thickens enough to coat the back of a spoon
- Whip the heavy cream:
- Beat the cold cream in a separate bowl until you achieve stiff peaks that hold their shape when you lift the whisk
- Combine the creamy layers:
- Beat the mascarpone and vanilla until smooth, then gently fold in the cooled egg mixture followed by the whipped cream until no streaks remain
- Dip and arrange the first layer:
- Quickly dip each ladyfinger into the cooled syrup and arrange them in a single layer in your dish
- Add cream and repeat:
- Spread half the mascarpone cream over the ladyfingers, then repeat with another dipped layer and finish with the remaining cream on top
- Chill thoroughly:
- Cover the dish and refrigerate for at least 4 hours though overnight is even better for the flavors to meld
- Finish before serving:
- Dust the top generously with cocoa powder or hojicha powder right before bringing it to the table
 Pin It
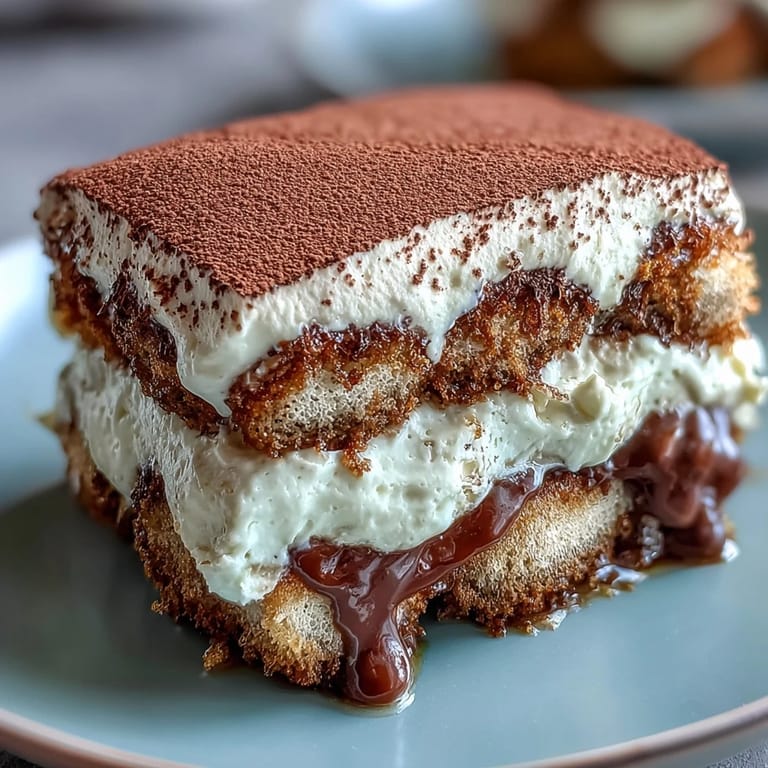
 This became the requested birthday dessert for two different family members this year. There is something about the combination of comfort and elegance that makes people feel celebrated.
Getting the Tea Strength Right
Weak hojicha syrup disappears beneath the cream while over-steeped syrup turns unpleasantly bitter and tannic. I have found that 5 minutes is the sweet spot where you get that gorgeous roasted flavor without any harshness. Taste the syrup after straining and adjust the sugar if needed before it cools completely.
Assembly Order Matters
Always work quickly when dipping your ladyfingers because they continue absorbing liquid even after they leave the bowl. I set up a little assembly line with my syrup, cream, and dish all within arms reach. The whole assembly process takes maybe ten minutes if you stay focused.
Make Ahead Strategy
This dessert actually tastes better on day two when the tea has fully permeated the cream and the ladyfingers have softened to that perfect custard-like texture. I often assemble it the night before a dinner party and simply dust with powder before serving. The only downside is stopping myself from sneaking a spoonful at midnight.
- Let it chill uncovered for the first hour then cover to prevent condensation from forming
- Use a fine mesh sieve for the most even dusting of cocoa or hojicha powder
- Serve with a cup of plain hojicha tea on the side to echo the flavors
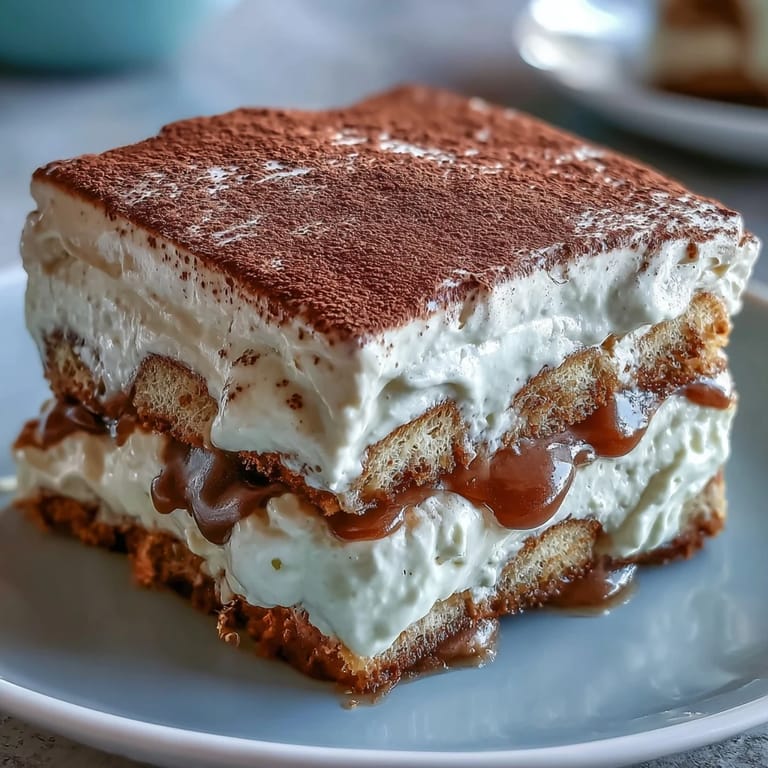 Pin It
 Every time I serve this, someone asks why tiramisu has not always been made with tea. The earthiness just works.
Recipe FAQs
- → Can I make hojicha tiramisu ahead of time?
Yes, this dessert actually improves with time. Make it up to 24 hours before serving and keep it refrigerated. The flavors develop and the texture becomes creamier as it sets.
- → Where can I buy hojicha tea?
Hojicha is available at Japanese grocery stores, specialty tea shops, and online retailers. You can use loose leaf or tea bags—both work perfectly for this dessert.
- → Can I substitute the ladyfingers?
Yes, you can use sponge cake cut into rectangles, pandoro cubes, or even gluten-free ladyfingers. Just ensure they're sturdy enough to hold the syrup without falling apart.
- → How do I store hojicha tiramisu?
Cover tightly with plastic wrap and refrigerate for up to 3 days. The texture remains excellent, though the cocoa powder dusting may absorb into the cream over time.
- → Can I make this without raw eggs?
The egg yolks are cooked in a double boiler until they reach 160°F, making them safe. Alternatively, use pasteurized eggs or substitute with Italian meringue for the cream base.
- → What can I use instead of mascarpone?
Cream cheese blended with heavy cream makes a decent substitute, though the flavor and texture will be slightly different. For the closest result, use equal parts mascarpone and crème fraîche.